

In this blog, we will show how to run a distributed video streaming performance test from AWS Cloud with UbikLoadPack streaming solution & Redline13.
You will use :
- JMeter + UbikLoadPack Streaming Solution as the load injector software allowing to realistically simulate Video Streaming Players (HLS, DASH, SMOOTH, HDS)
- Redline13 as the web SAAS platform to:
- easily deploy JMeter and UbikLoadPack
- monitor your performance test during runs
- get detailed JMeter HTML report after run including UbikLoadPack dedicated metrics and graphs
- historize your runs
- Amazon AWS as the platform for load injectors
The JMeter setup
The JMeter Test plan is very simple :

We have a Thread Group where duration, threads, ramp-up and startup delay have been made variable, this will allow us to control them from the Web Interface of Redline13 :
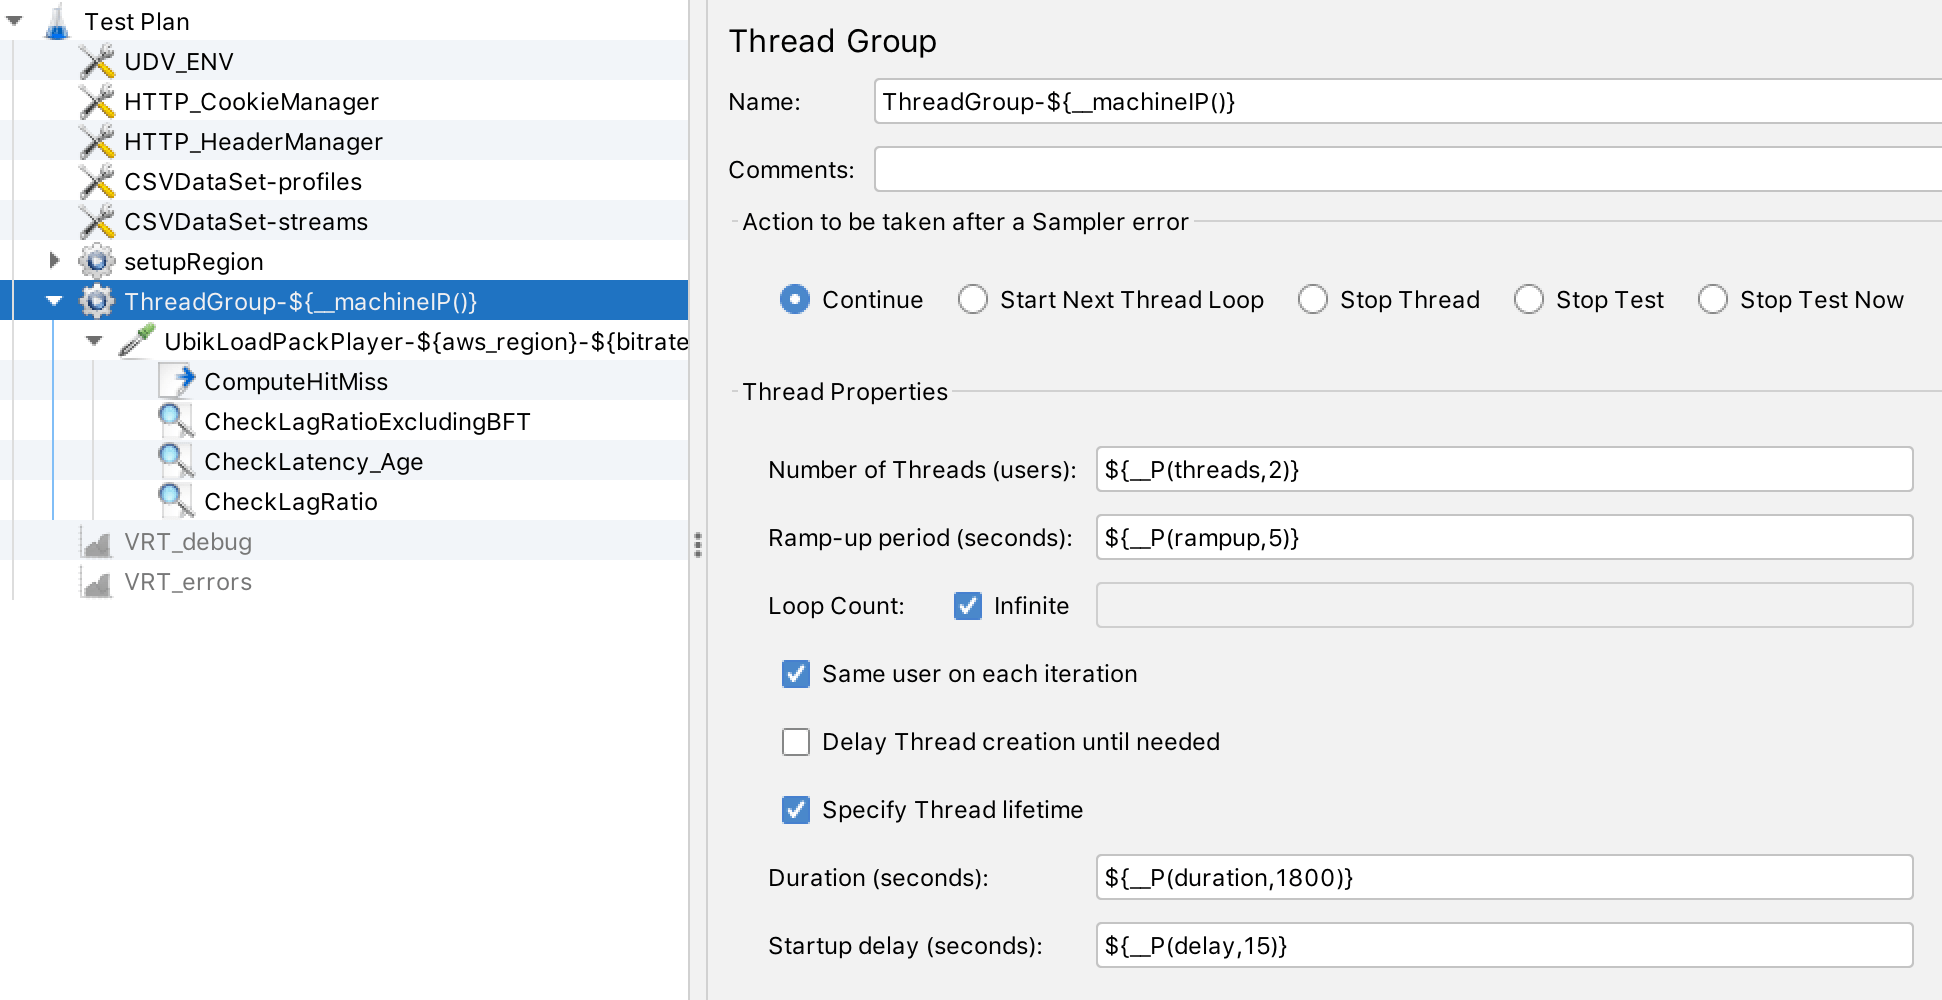
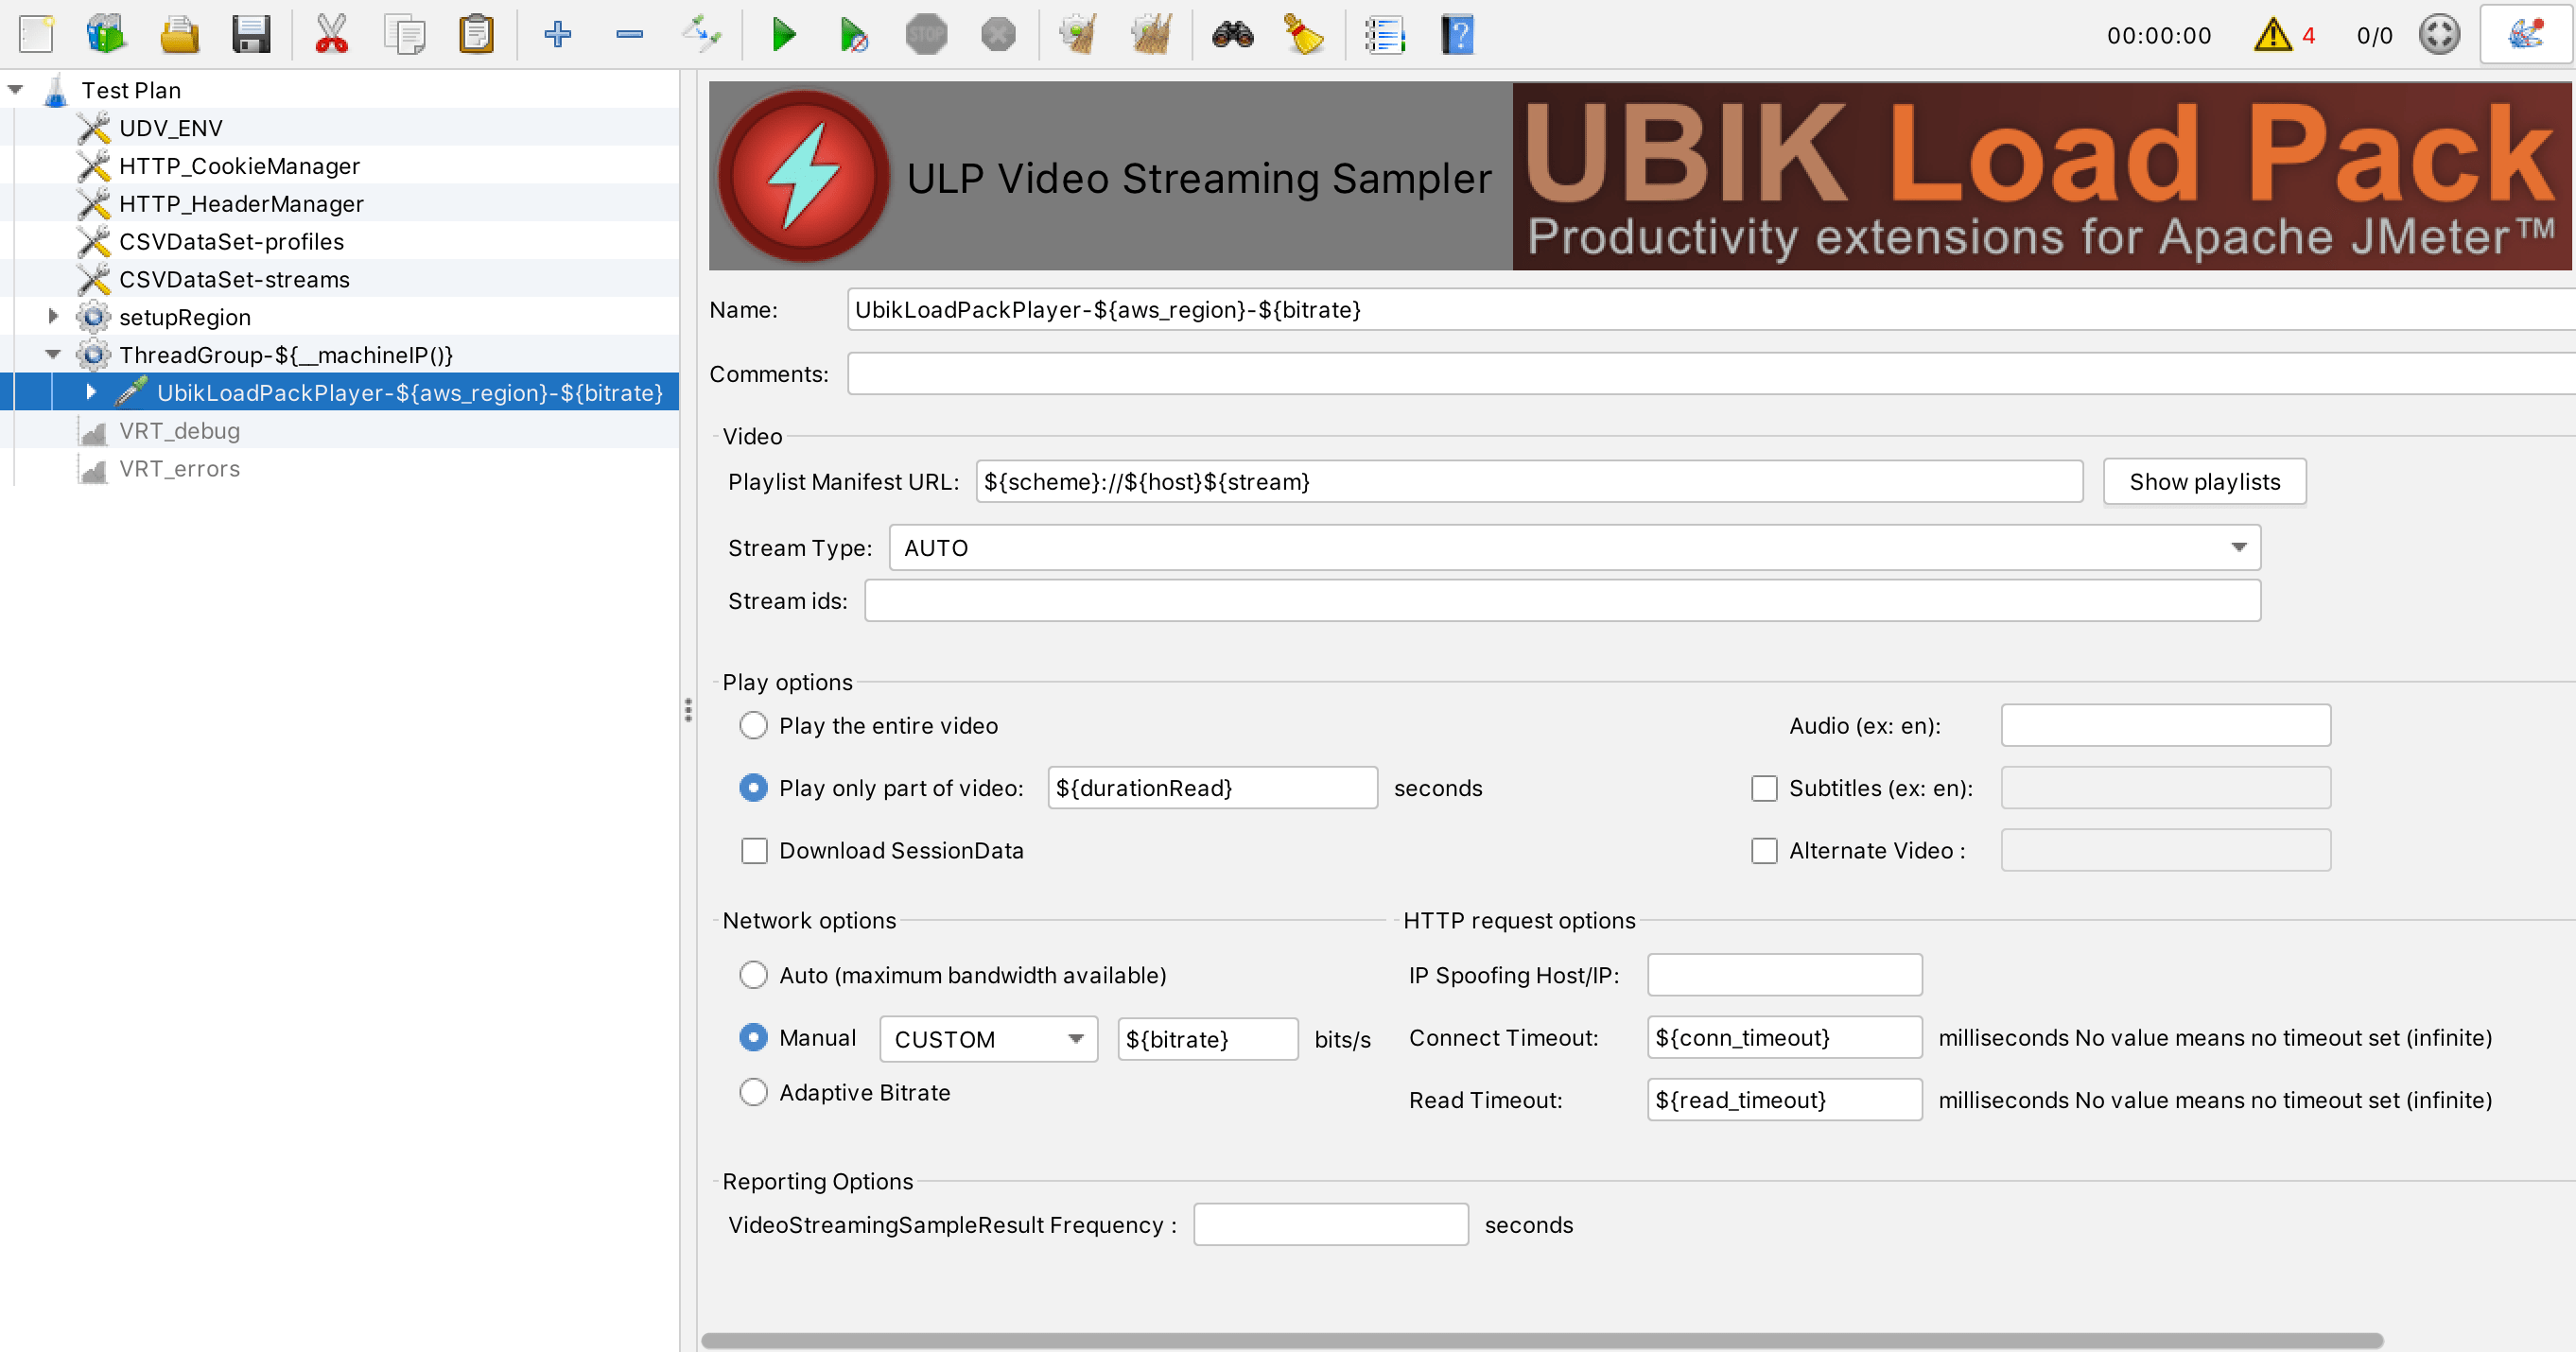
The Thread Group contains ULP Video Streaming Sampler which uses the stream and bitrate variables coming from CSVs and durationRead, conn_timeout and read_timeout defined in UDV_ENV (User Defined Variables):
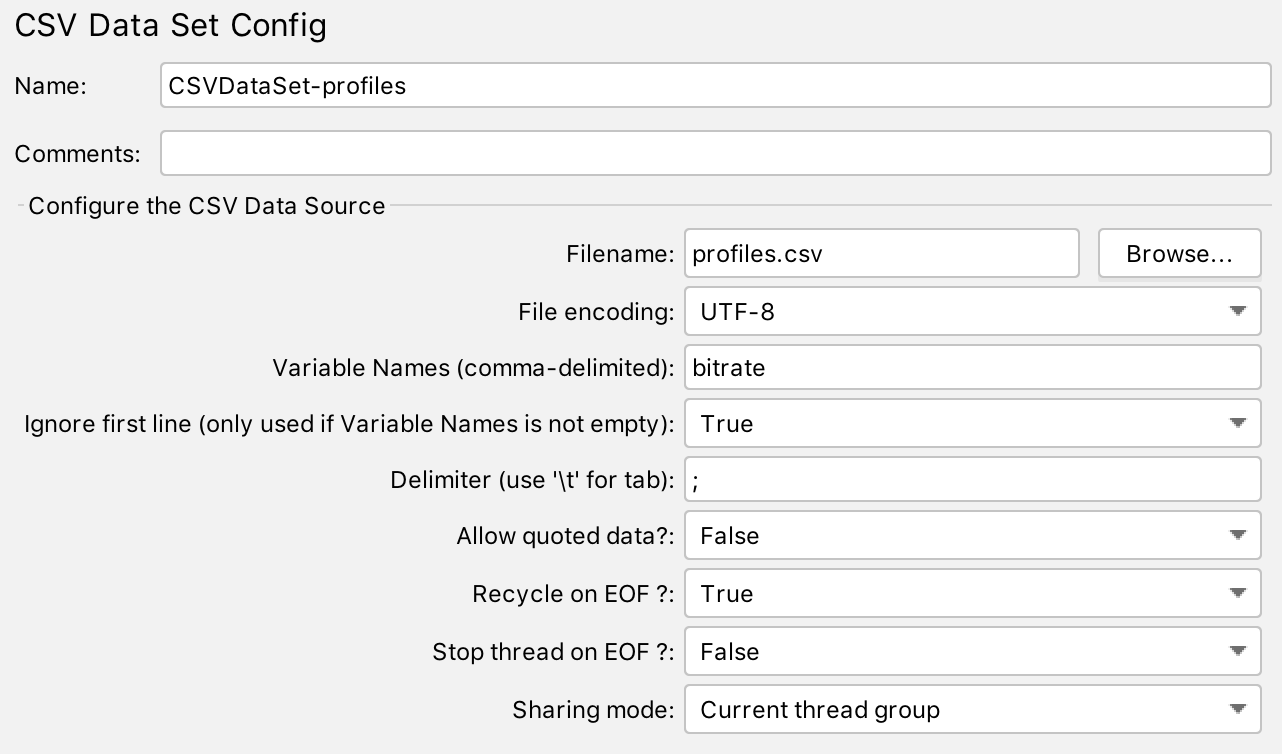
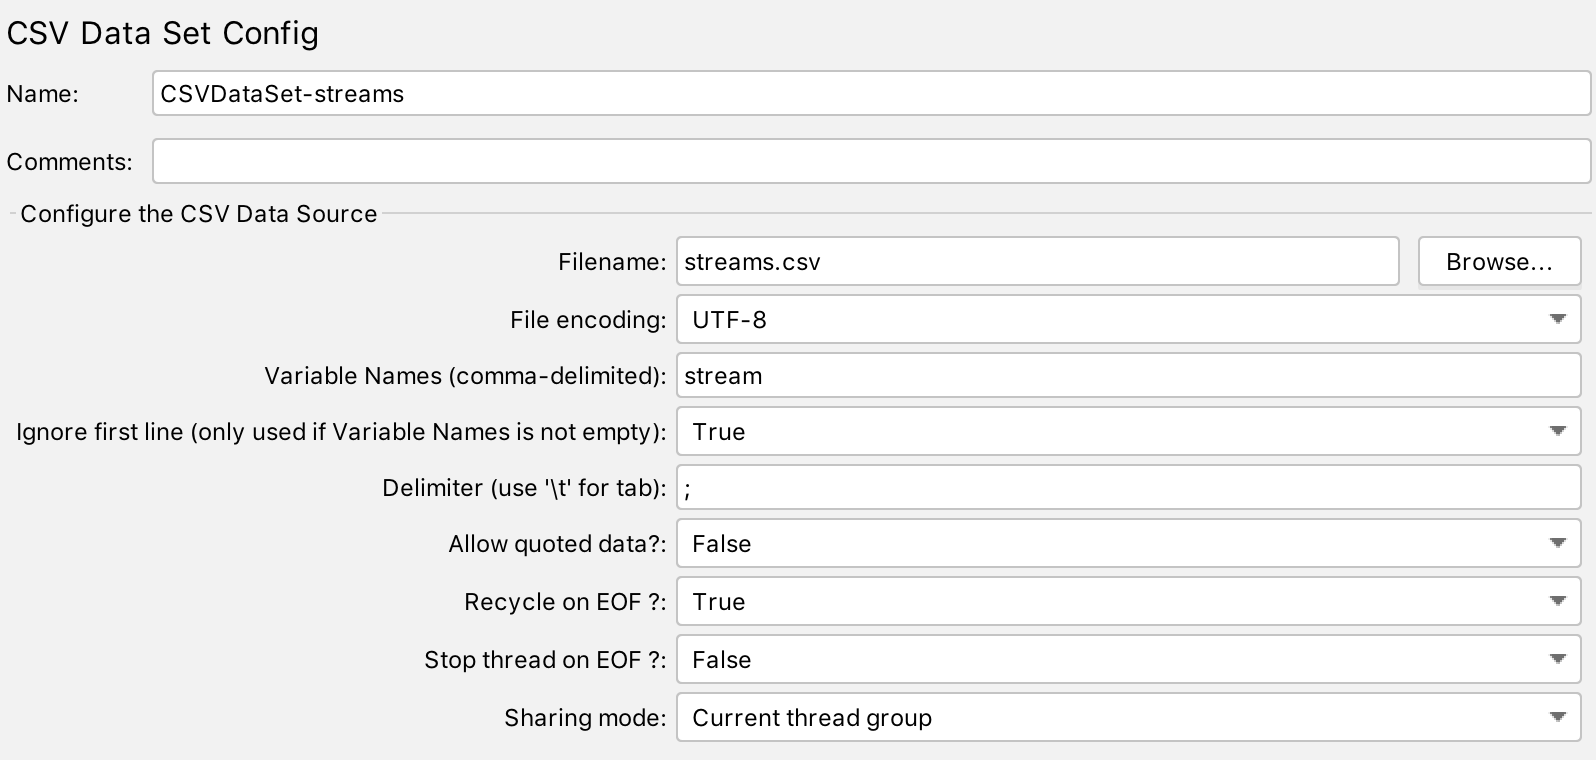
And 2 CSV files to be able to vary Streams and Bitrates:
- profiles.csv (loaded by JMeter CSV DataSet CSV-Profiles) contains the bitrates we want to test, this element will fill in ${bitrate} variable on each iteration of CSV with a different value
- streams.csv (loaded by JMeter CSV DataSet CSV-streams) contains the streams URL suffixes we want to test, this element will fill in ${stream} variable on each iteration of CSV with a different value
AWS setup
AWS setup is very easy and described here.
Redline13 Setup
Note you need a paid subscription in order to have access to some of the features described below.
The configuration is pretty straight forward and is done in one page.
First go to Account > Your Plugins:
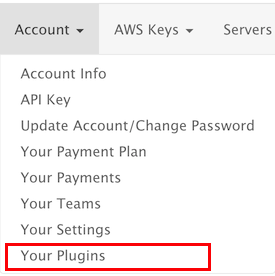
In Installed tab add plugins :
- JMeter Plugin Manager
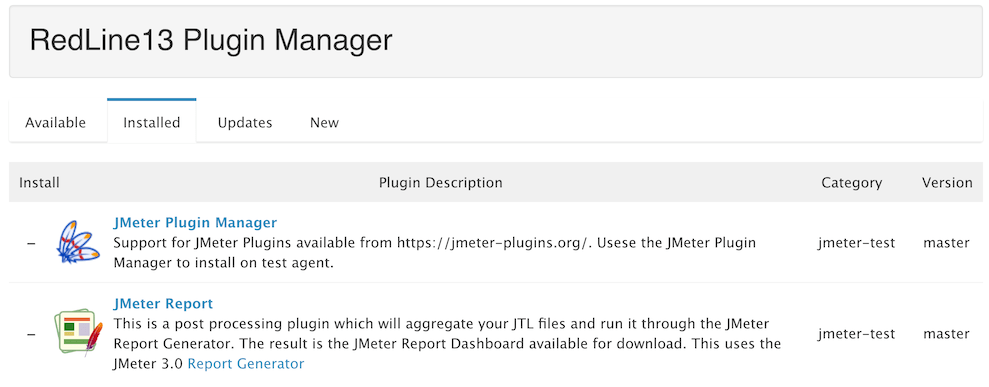
- JMeter Report
You should have this in installed tab :
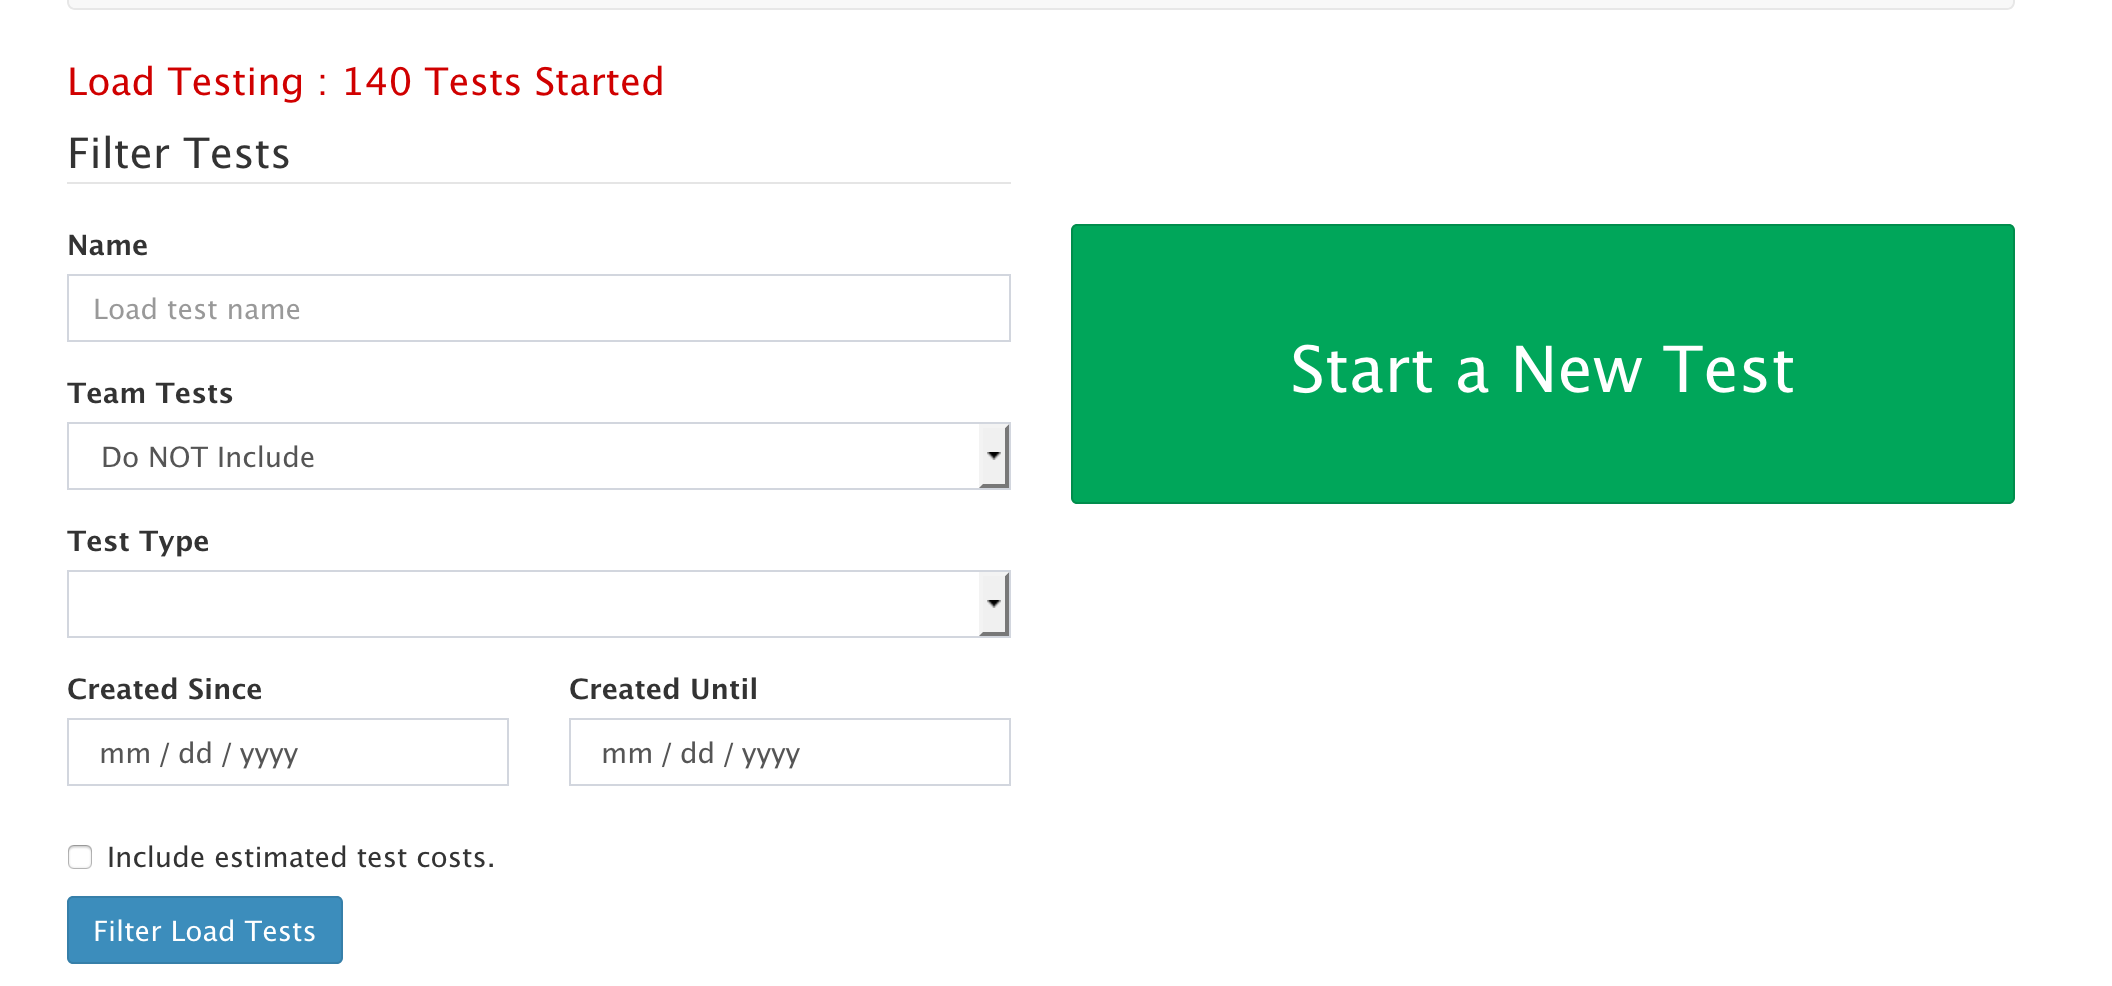
Click Start a New Test :
Select “Jmeter Test” Tab :
- In Upload JMX , select your JMeter jmx file
- Upload the UbikLoadPack license file you received by mail after requesting a trial at this page
- Upload the 2 CSVs (profiles.csv and streams.csv)
- Select JMeter version (the most up to date one)

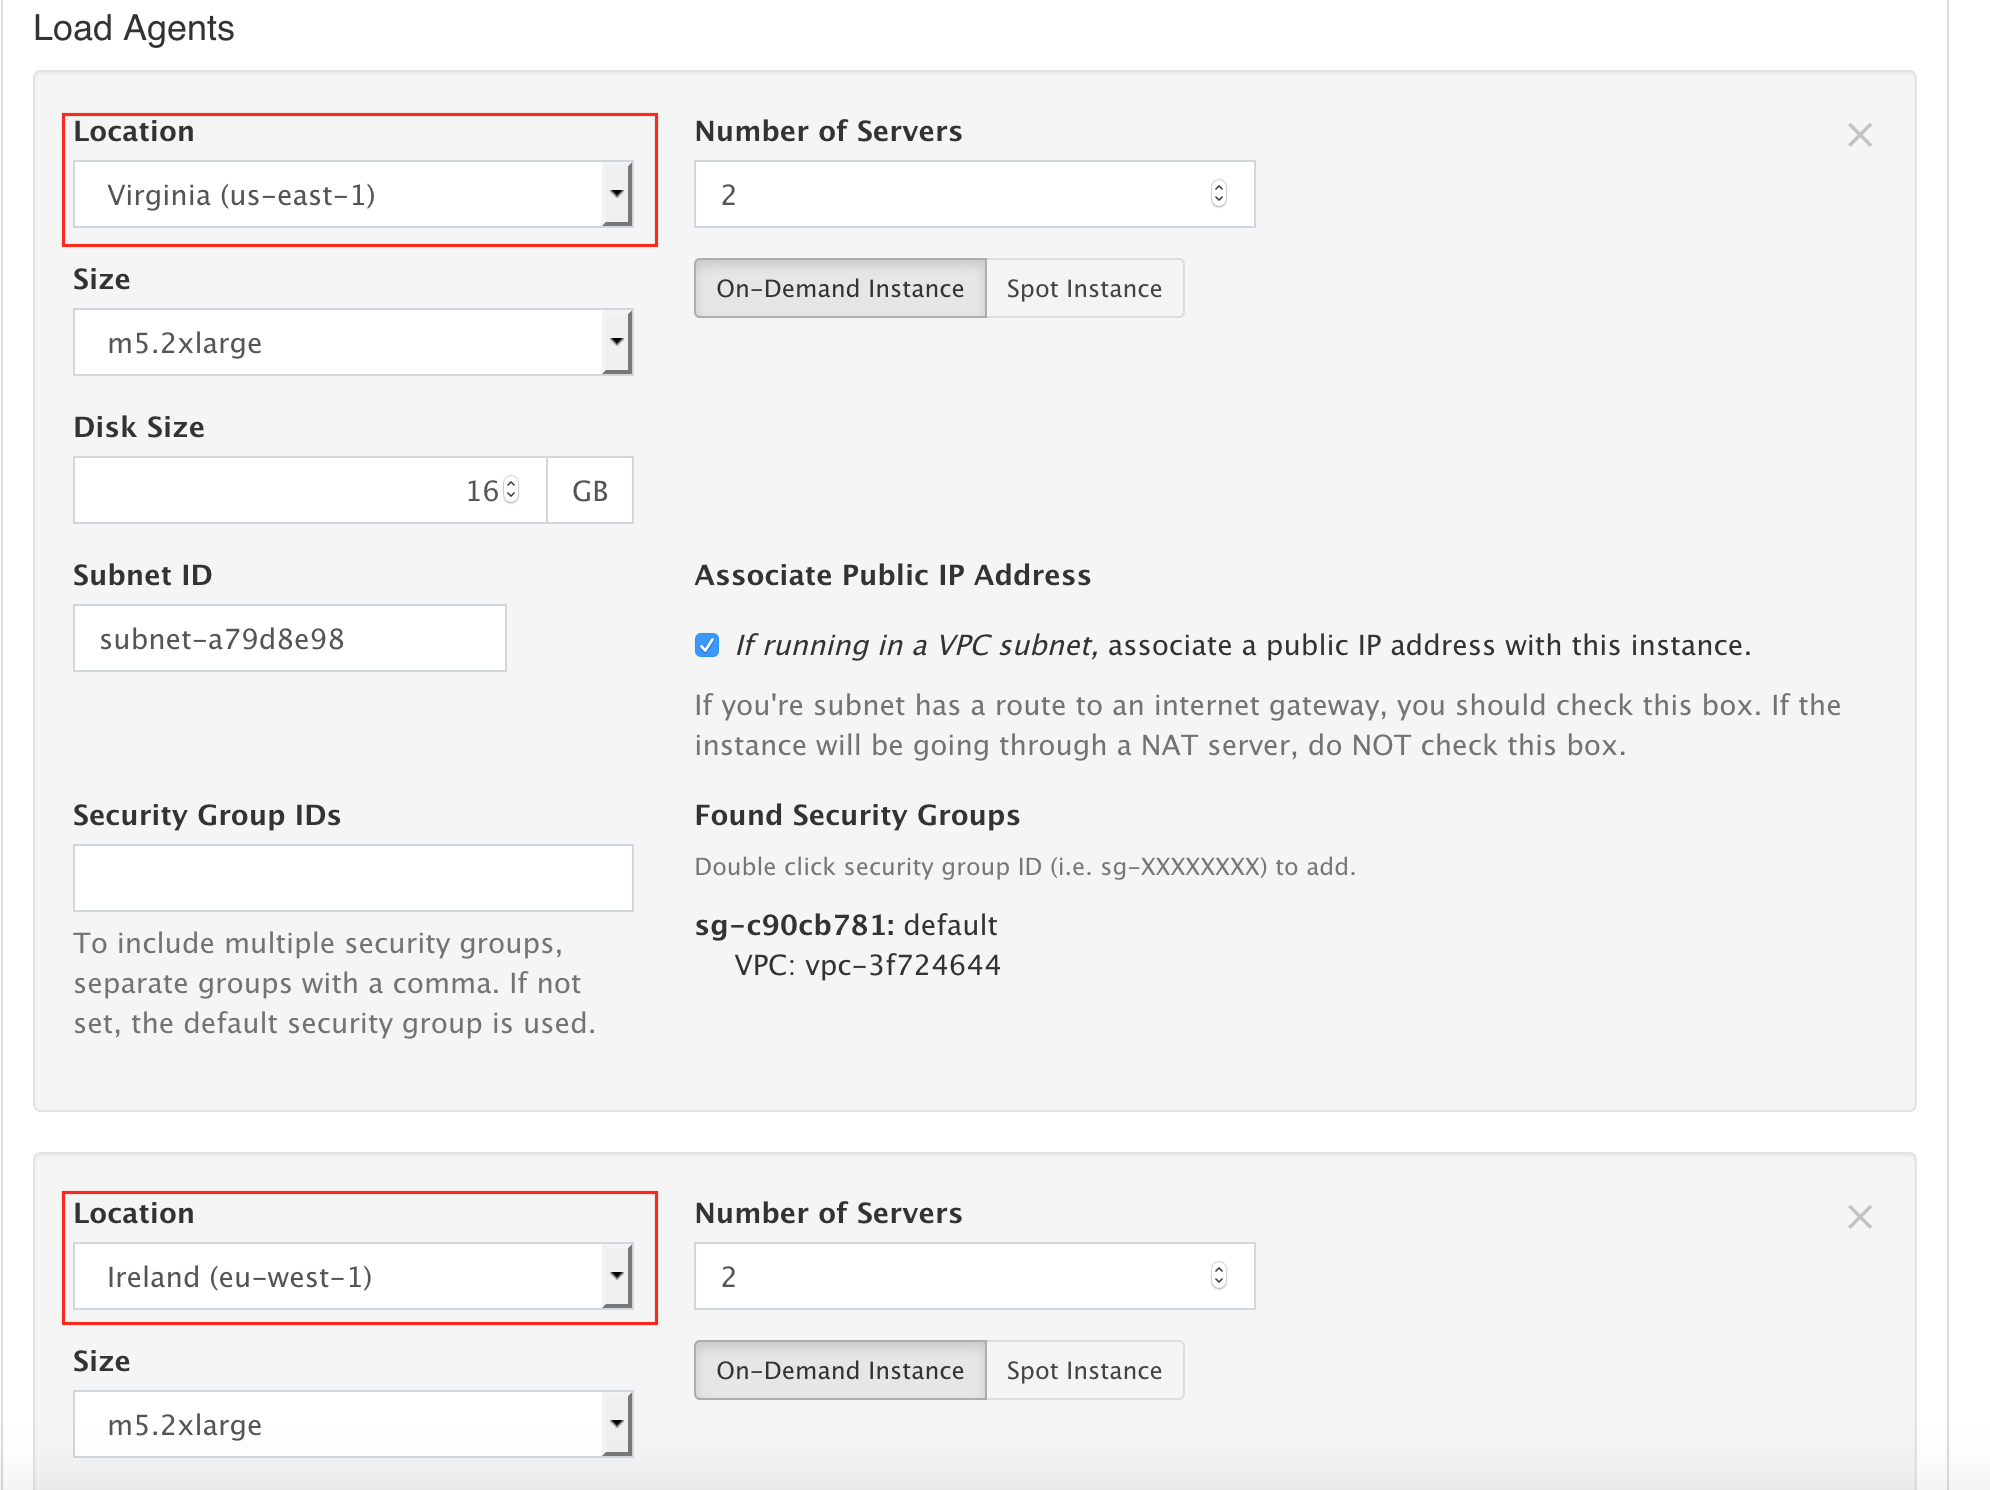
Configure “Advanced Cloud Options” options :
Ensure you fill:
- Location, in the below example we used Ireland and Virginia as a first step
- Number of servers
- Size (type of server)
- Subnet ID (just click in the field and it’s automatically filled)
In the below example we use 4 Machines :
- 2 M5.2XLARGE in Virginia
- 2 M5.2XLARGE in Ireland
Configure “Advanced JMeter Test” options
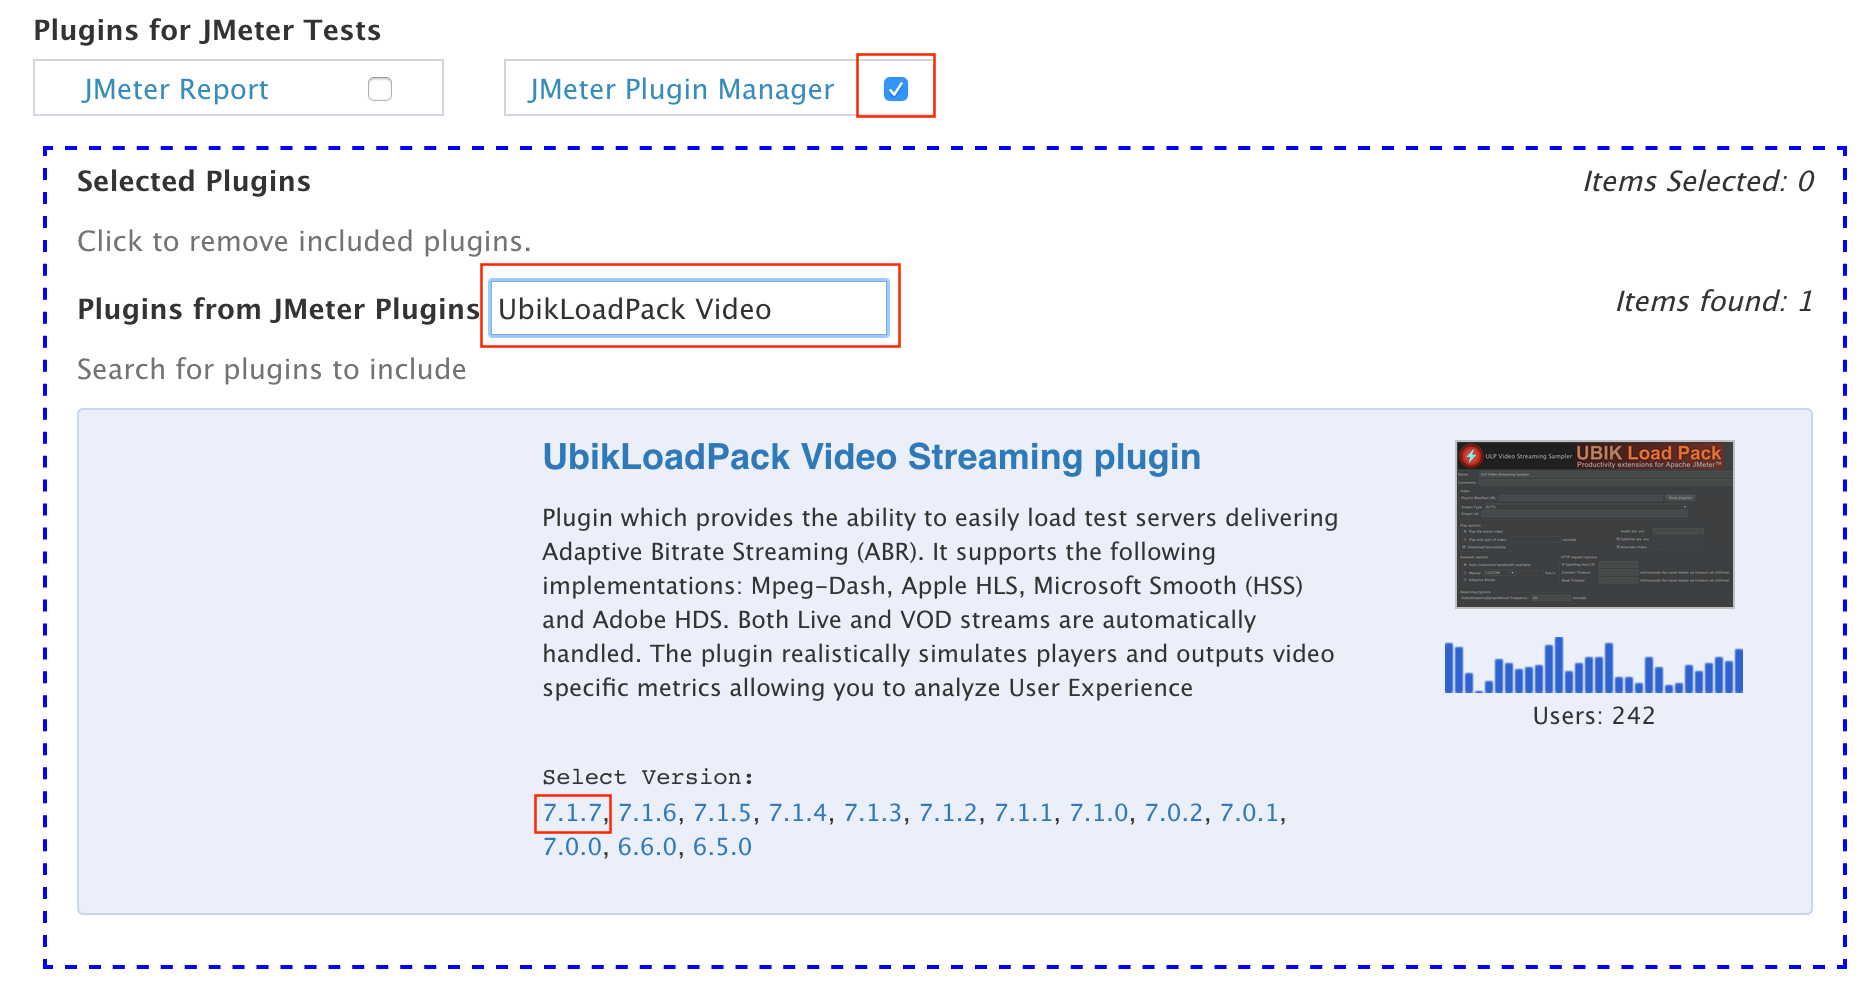
- In “JMeter Plugin support”, check “JMeter Plugin Manager” option
- Search for our plugin using “UbikLoadPack Video” test in “Plugins from JMeter Plugins”
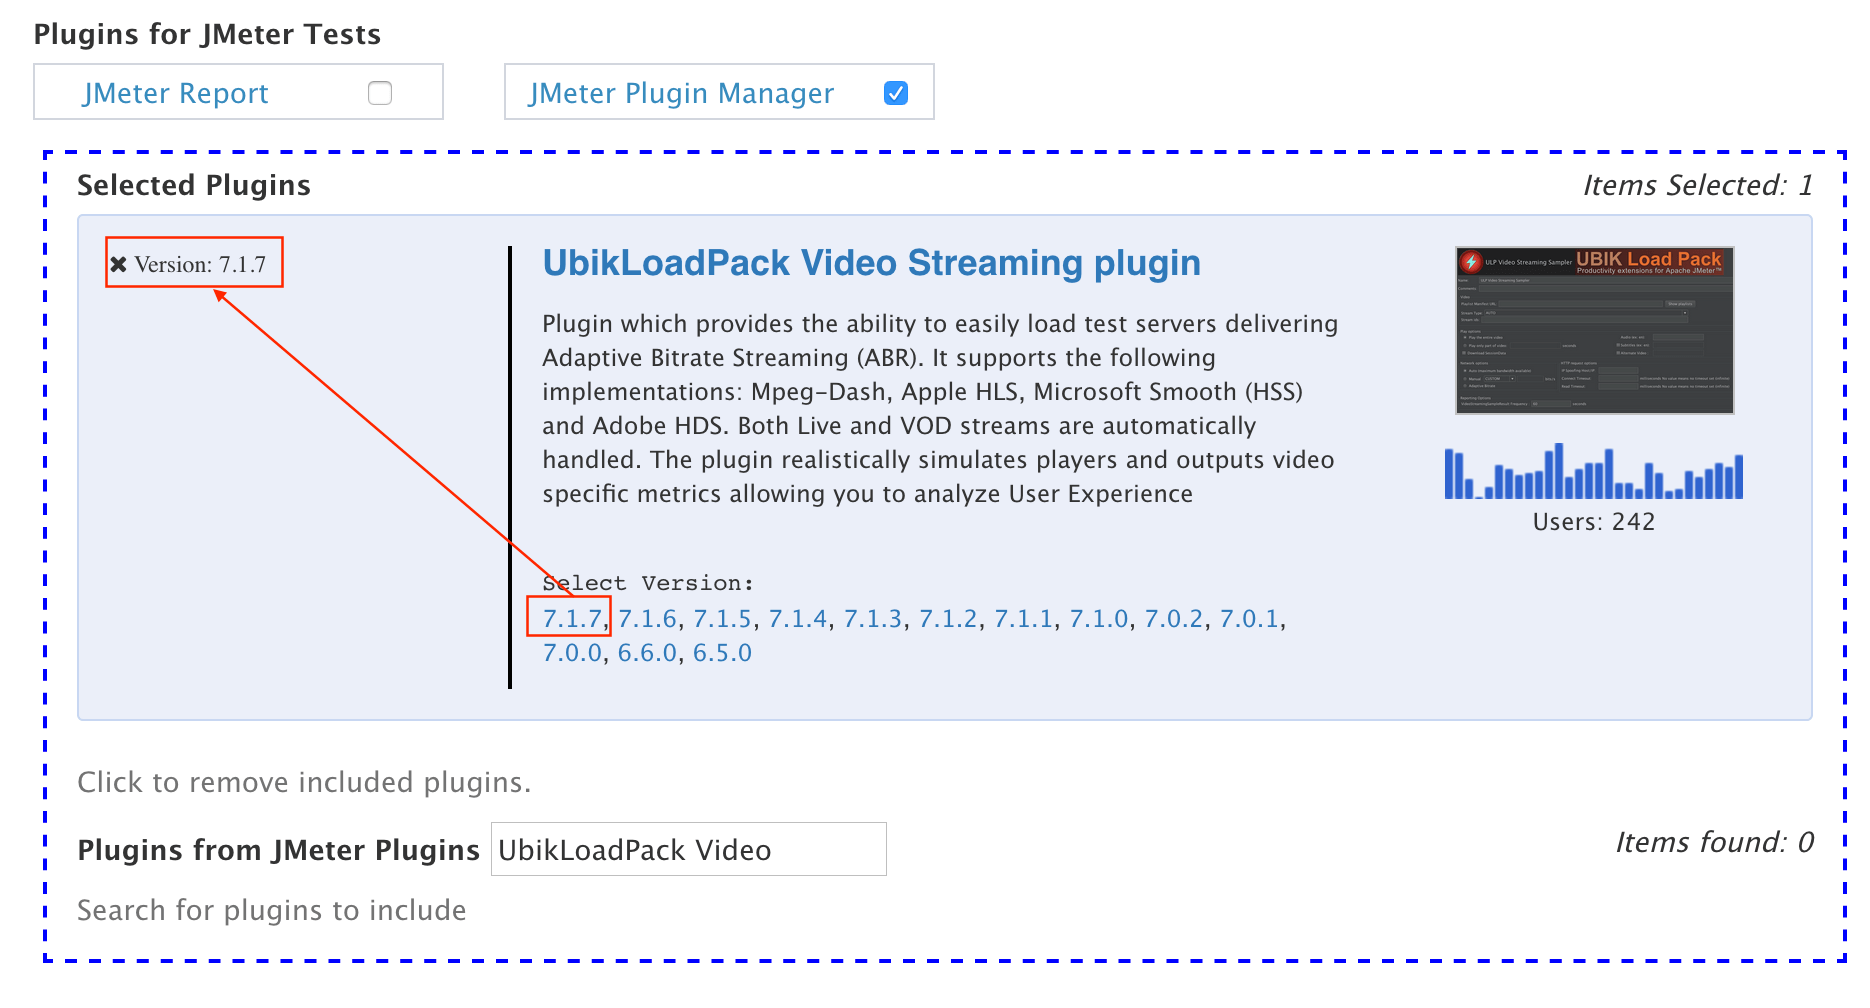
- Click on the version of plugin you want to use, 7.1.7 at the time of this blog writing, select the most recent ones (latest and greatest :-)) :
- You should end up with this :
- Check plugin “JMeter Report” and fill in the APDEX thresholds you want (200 ms for Satisfied, 400ms for Tolerated in our case)

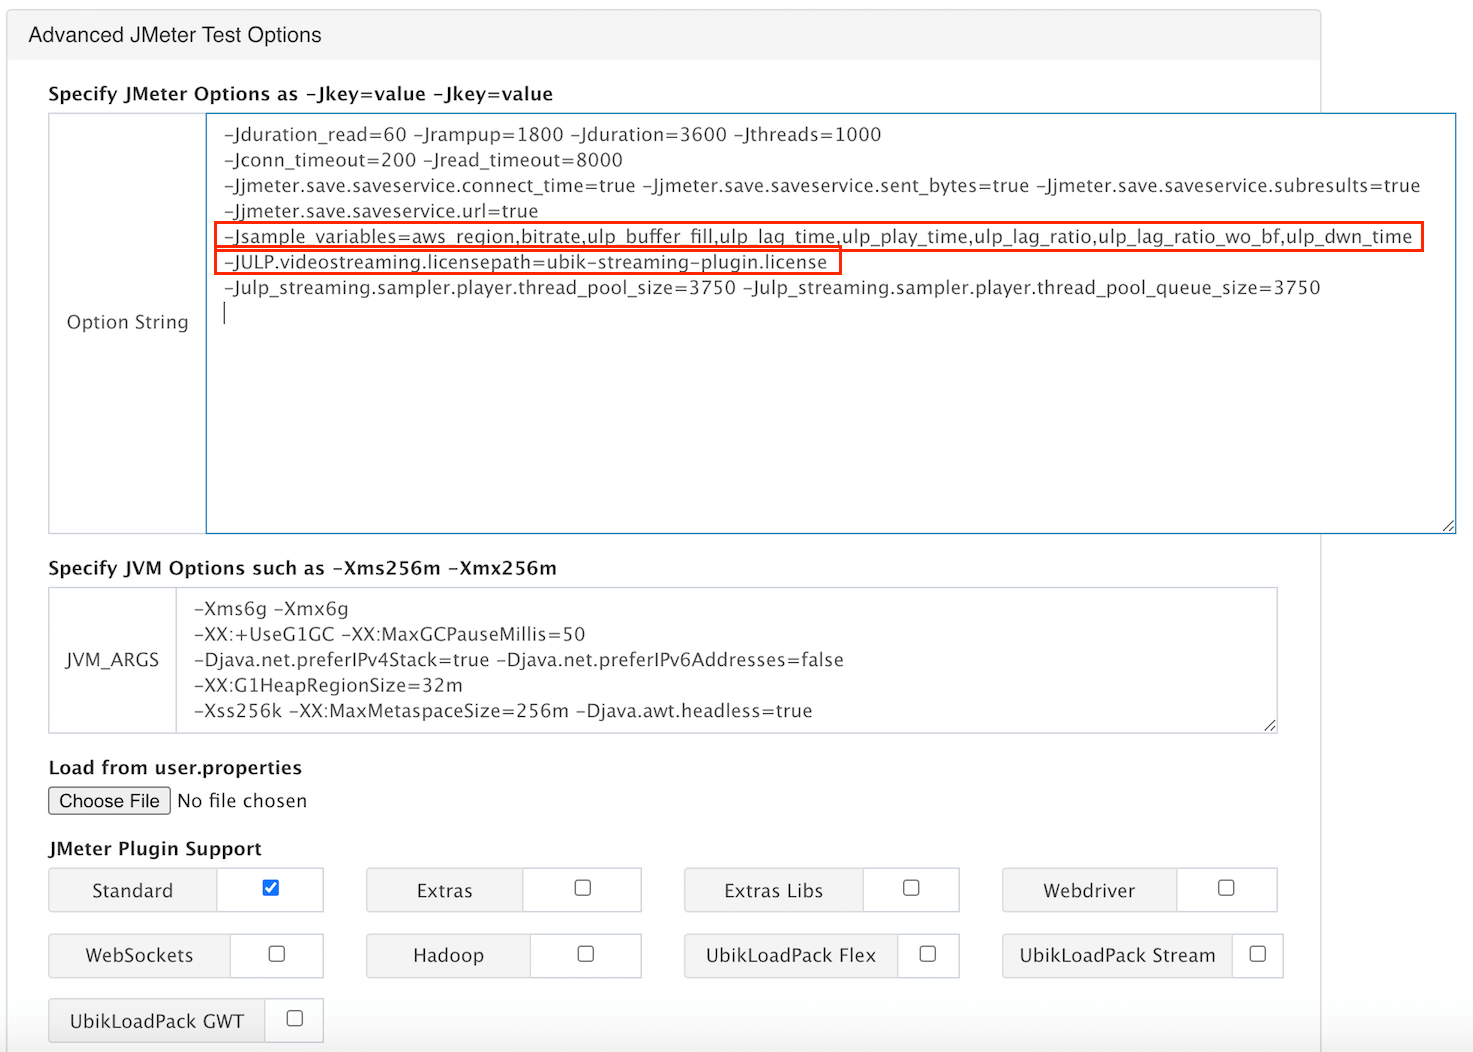
- In “Option String” , adjust JMeter properties as you would from command line and for the UbikLoadPack plugin you need to set those ones:
- License:
-JULP.videostreaming.licensepath=ubik-streaming-plugin.license
- Fields saved and needed for the report :
-Jjmeter.save.saveservice.sent_bytes=true
-Jjmeter.save.saveservice.connect_time=true
-Jjmeter.save.saveservice.subresults=true
-Jjmeter.save.saveservice.url=true
-Jsample_variables=aws_region,bitrate,ulp_buffer_fill,ulp_lag_time,ulp_play_time,ulp_lag_ratio,ulp_lag_ratio_wo_bf,ulp_dwn_time
- Configuration of test plan used for demo, we will set the properties used by test plan (notice the test plan uses JMeter __P function)
-Jduration_read=60 -Jrampup=120 -Jduration=600 -Jthreads=1000
You end up with :
- In the above line , you may need to adjust parameters in bold depending on:
- Number of Players you want to simulate per machine (threads)
- Duration of your test (duration)
- Rampup of load test (rampup)
- Duration of video read in your test (duration_read property)
-XX:+UseG1GC -XX:MaxGCPauseMillis=50 -Djava.net.preferIPv4Stack=true -Djava.net.preferIPv6Addresses=false -XX:G1HeapRegionSize=32m -Xss256k -Xms6g -Xmx6g -XX:MaxMetaspaceSize=256m -Djava.awt.headless=true
- In the above line , you may need to adjust parameters in bold depending on:
- type of AWS instance and its memory (-Xms6g -Xmx6g)
Give a name to your test and click Start !
The test is now running, you can monitor it in the GUI and view while test is running :
- Request metrics (Requests per second, KB Per request, Avg response time)
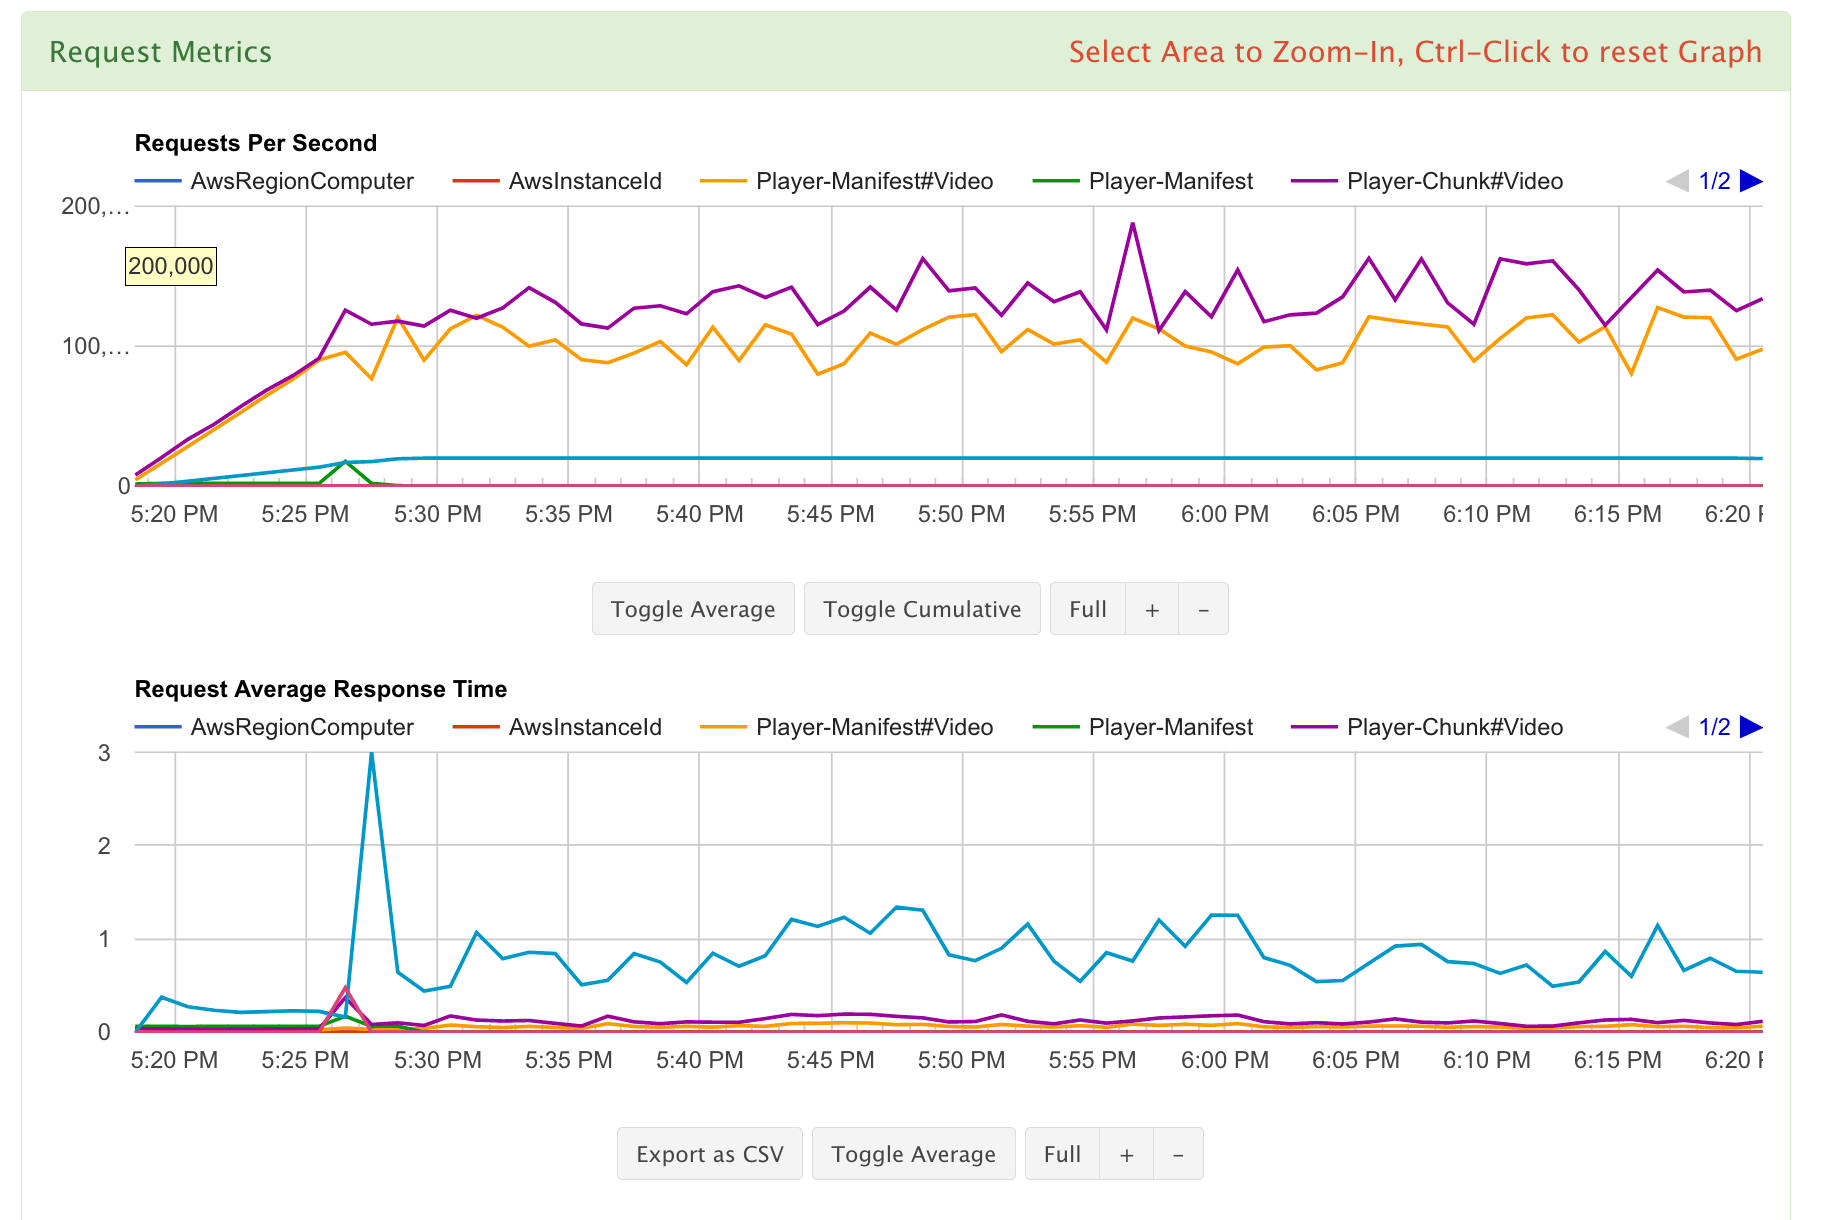
- Error metrics (Errors per second, KB Per error, Error avg response time)
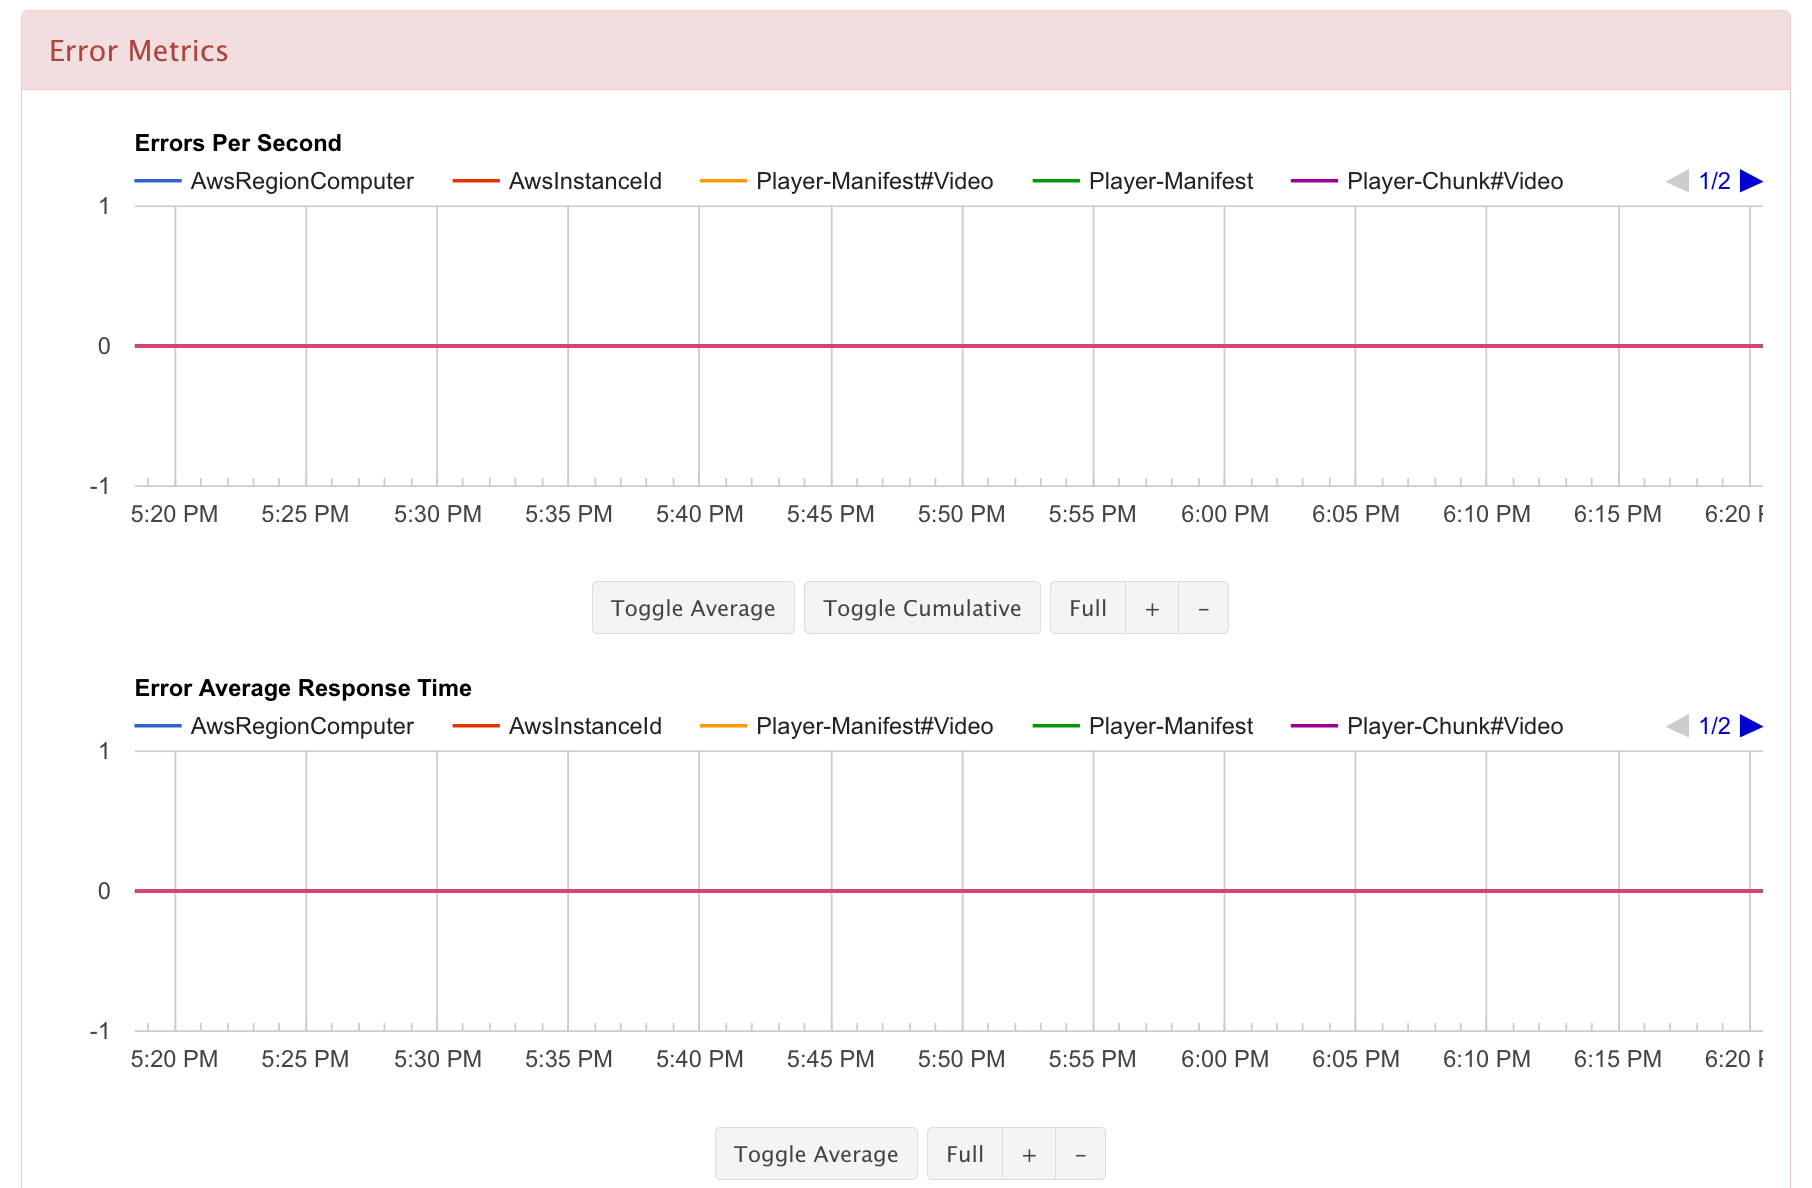
- Agent metrics (CPU usage, Network In/Out)
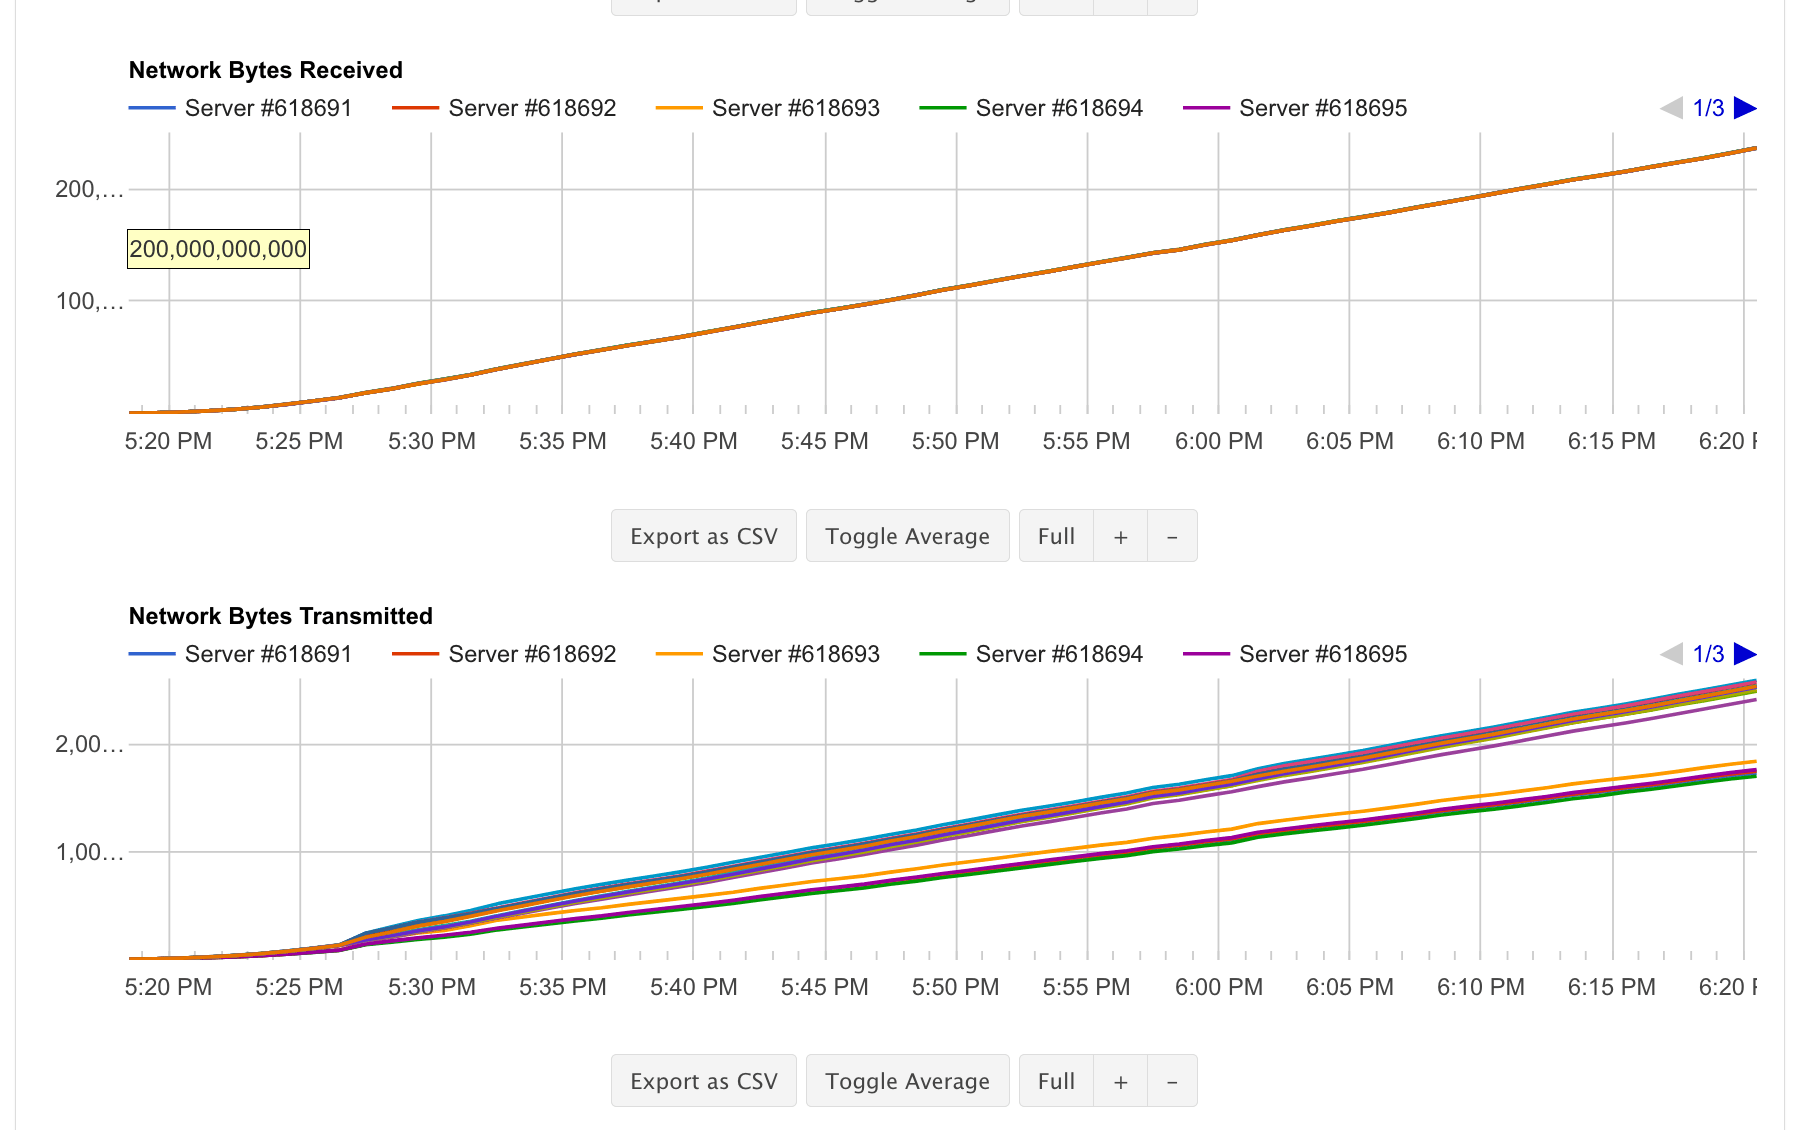
- The error table
Analyzing the test
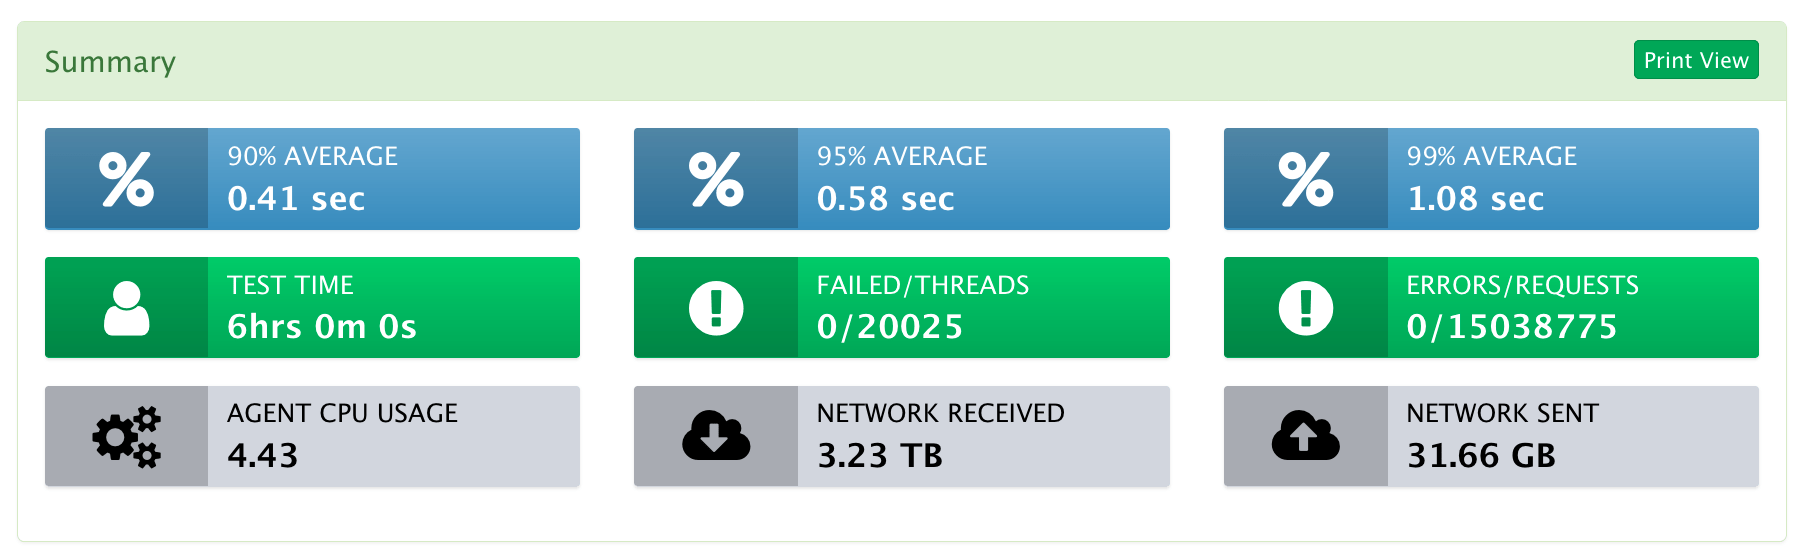
Once your test is done, at the end of the test:
- Find an overview of your test in Summary
- Have the details of the run (JMeter and Cloud options)
- Add Notes and comments on your test
- Download jmeter logs from every server
- More importantly:
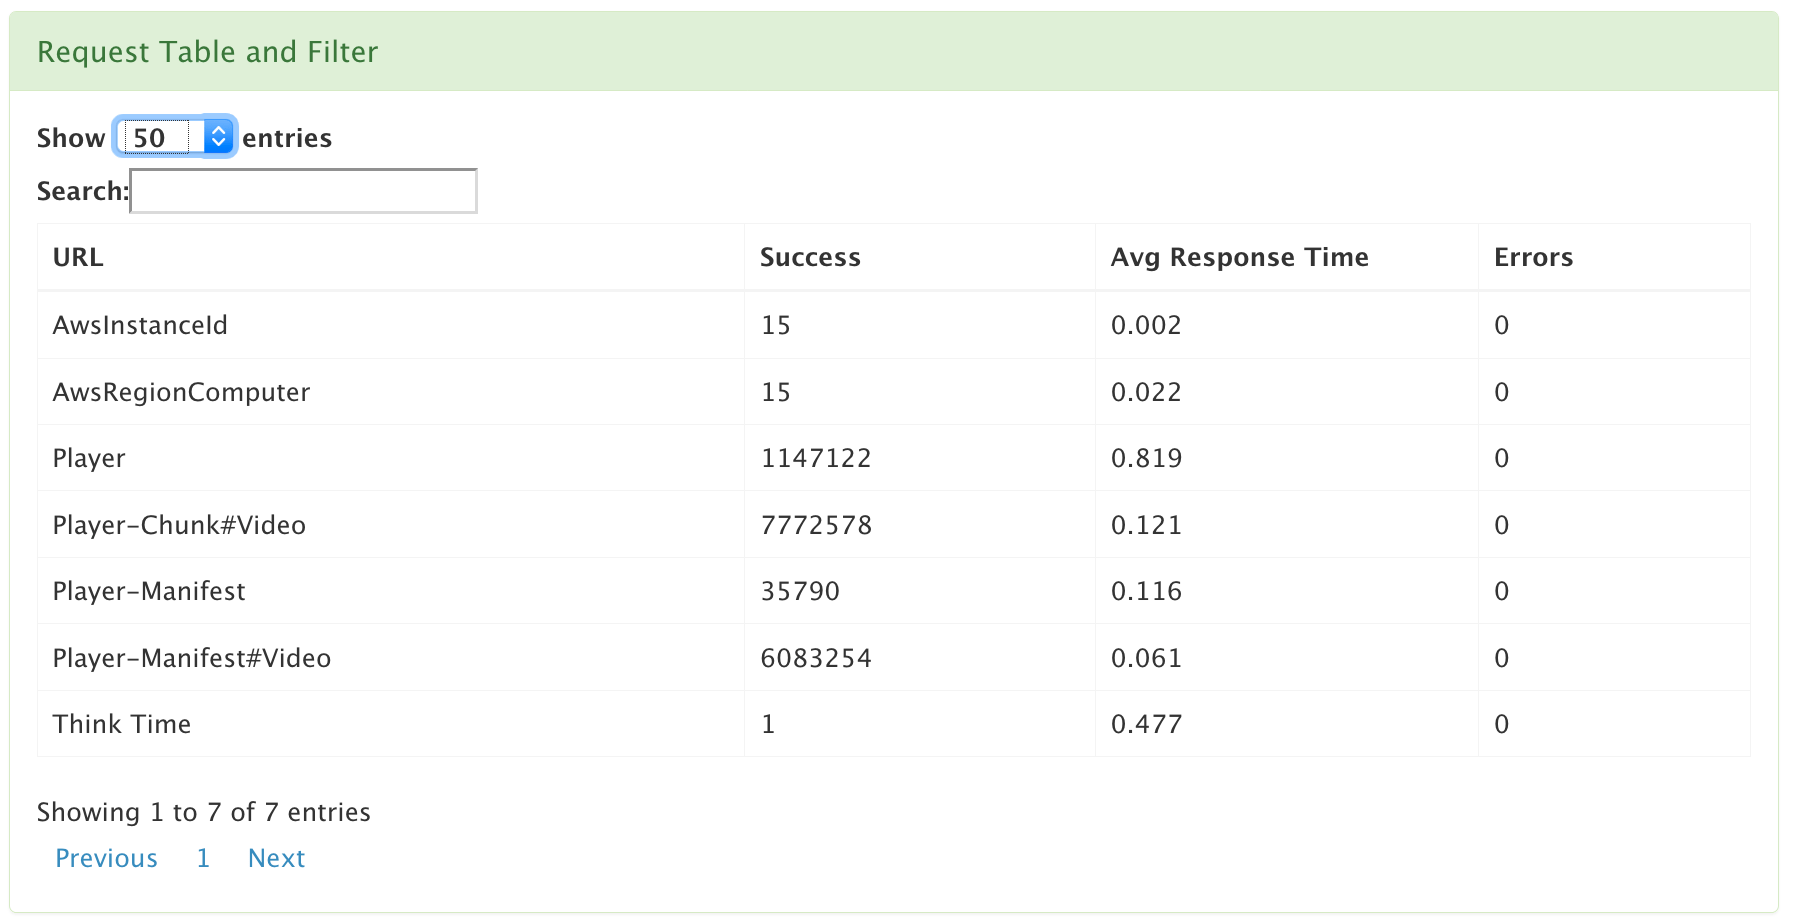
- you can download the HTML JMeter report generated accross all server . Note that this report will contain starting from version 5.0 of JMeter the custom graphs for :
- Statistics (response time in percentiles, error rate, network…) by type of request by type:
- Manifest
- Chunk
- Subtitles
- lag ratio graph
- lag ratio without buffer fill graph
- buffer fill graph
- lag time graph
- Statistics (response time in percentiles, error rate, network…) by type of request by type:
- you can download the merged CSV accross all server that contains the custom metrics
- you can download the HTML JMeter report generated accross all server . Note that this report will contain starting from version 5.0 of JMeter the custom graphs for :
About UbikLoadPack :

- Ubik Load Pack is used by Big players in the Video streaming field
- We provide professional services for Load Testing
- Learn more about our streaming plugin
- Detailed features of UbikLoadPack Streaming Solution
- Get a Free trial
You’ll probably also like :
- Performance Testing Low Latency Dash servers with UbikLoadPack
- Performance Testing Low Latency HLS servers
- Load testing MPEG-DASH Video Streaming with Apache JMeter and UbikLoadPack
- Video Streaming: CMAF and Low-Latency
- Cases studies
You might want to read :
- How Low latency HLS will improve User Experience in Video Streaming and OTT
- Performance Testing Low Latency Dash servers with UbikLoadPack
- Video Streaming Top 5 metrics to analyze your User’s Experience
- Load testing MPEG-DASH Video Streaming with Apache JMeter and UbikLoadPack
- Video Streaming: CMAF and Low-Latency
UbikLoadPack solution

![]()
Publication
![]()
