Running a Video Streaming Performance Test with Blazemeter and UbikLoadPack
In this blog, we will see how to run a Video Streaming Performance Test on a server delivering one of the following formats:
- Apple HLS
- Mpeg-Dash
- Microsoft Smooth (HSS)
- Adobe HDS
We’ll use the following tools:
- Apache JMeter to setup the test
- UbikLoadPack Video Streaming Plugin to simulate realistically video players and get Video Metrics
- Blazemeter to run a massive test (note we advise you to use Redline13 both for ease of use with our solution and its cost-effectiveness)
Pre-requisites
To run what is described below:
- Install Java 11 or Java 17
- Request a trial version of UbikLoadPack Video Streaming Plugin, you’ll receive a mail with an attached trial license and a link to download the bundle.
- Clone our repository:
git clone https://github.com/ubikloadpack/videostreaming_taurus_demo.git
- cd into the folder
videostreaming_taurus_demo/blazemeter
The JMeter test plan
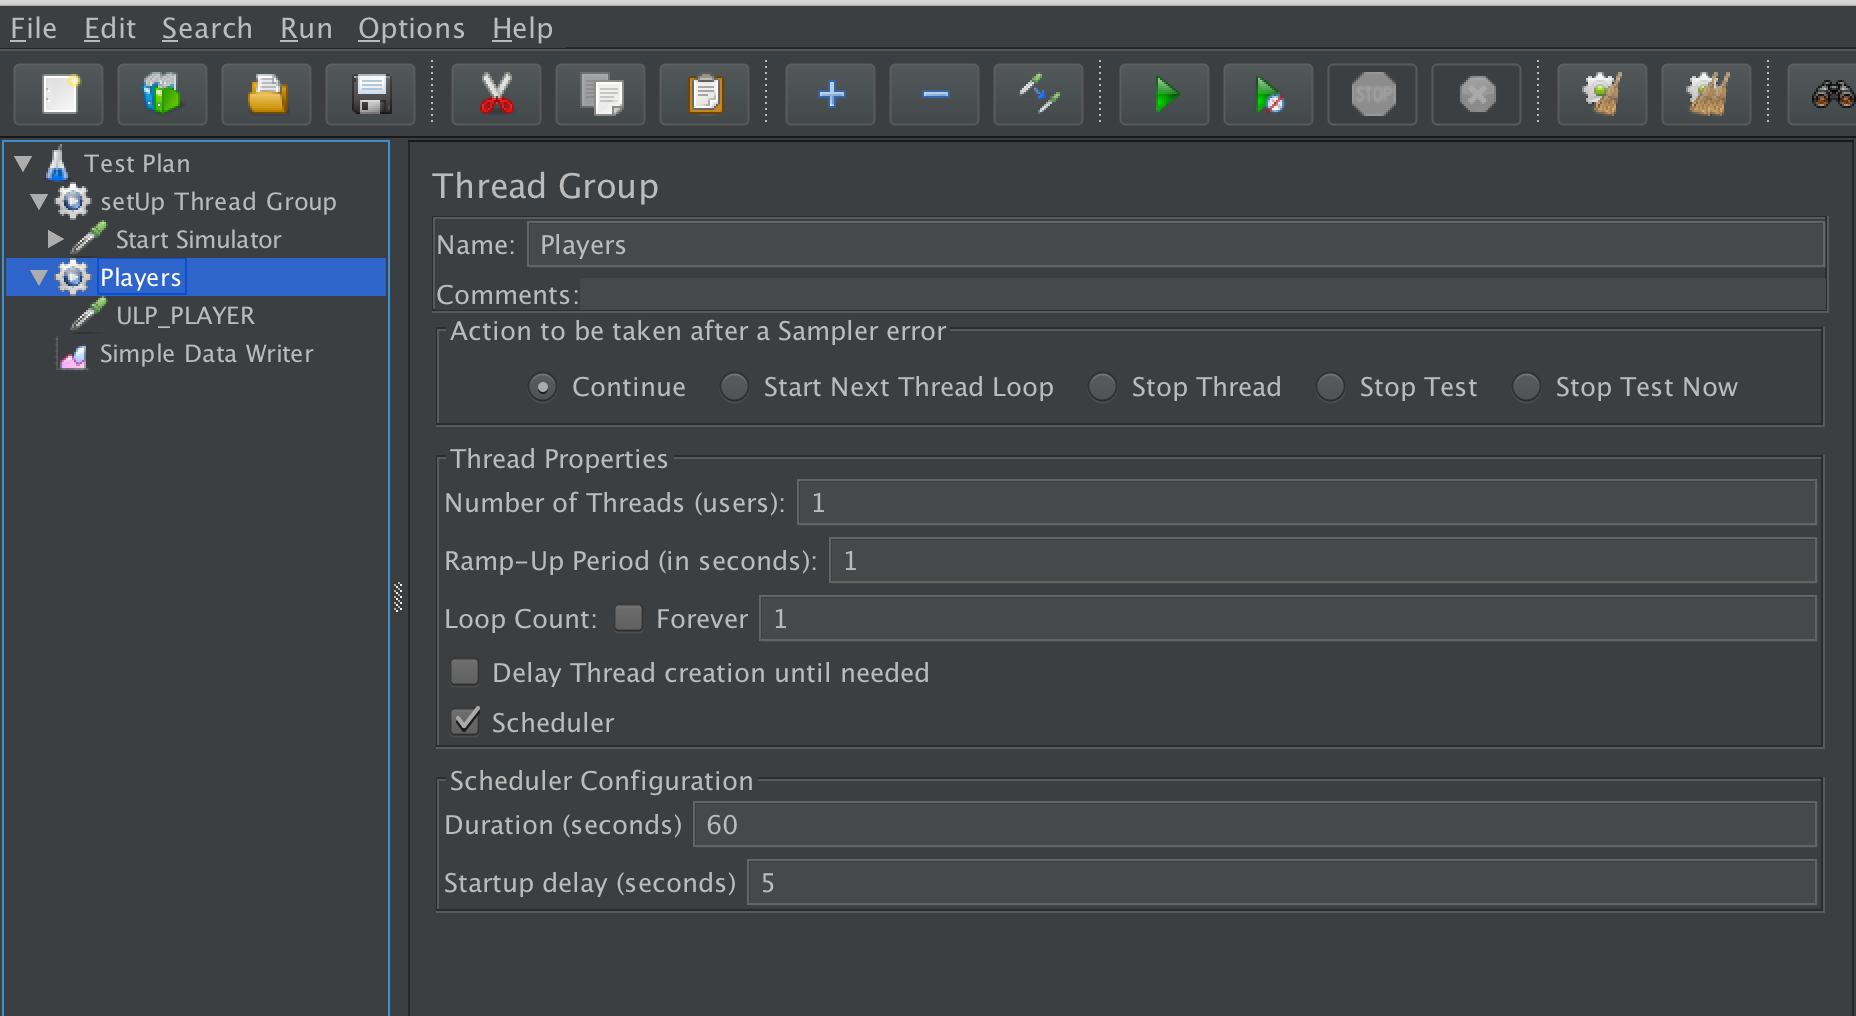
We’ll use a very simple test plan :
Note that we don’t configure anything in Thread Group regarding Users Arrival and schedule as it will be done in Taurus YAML file
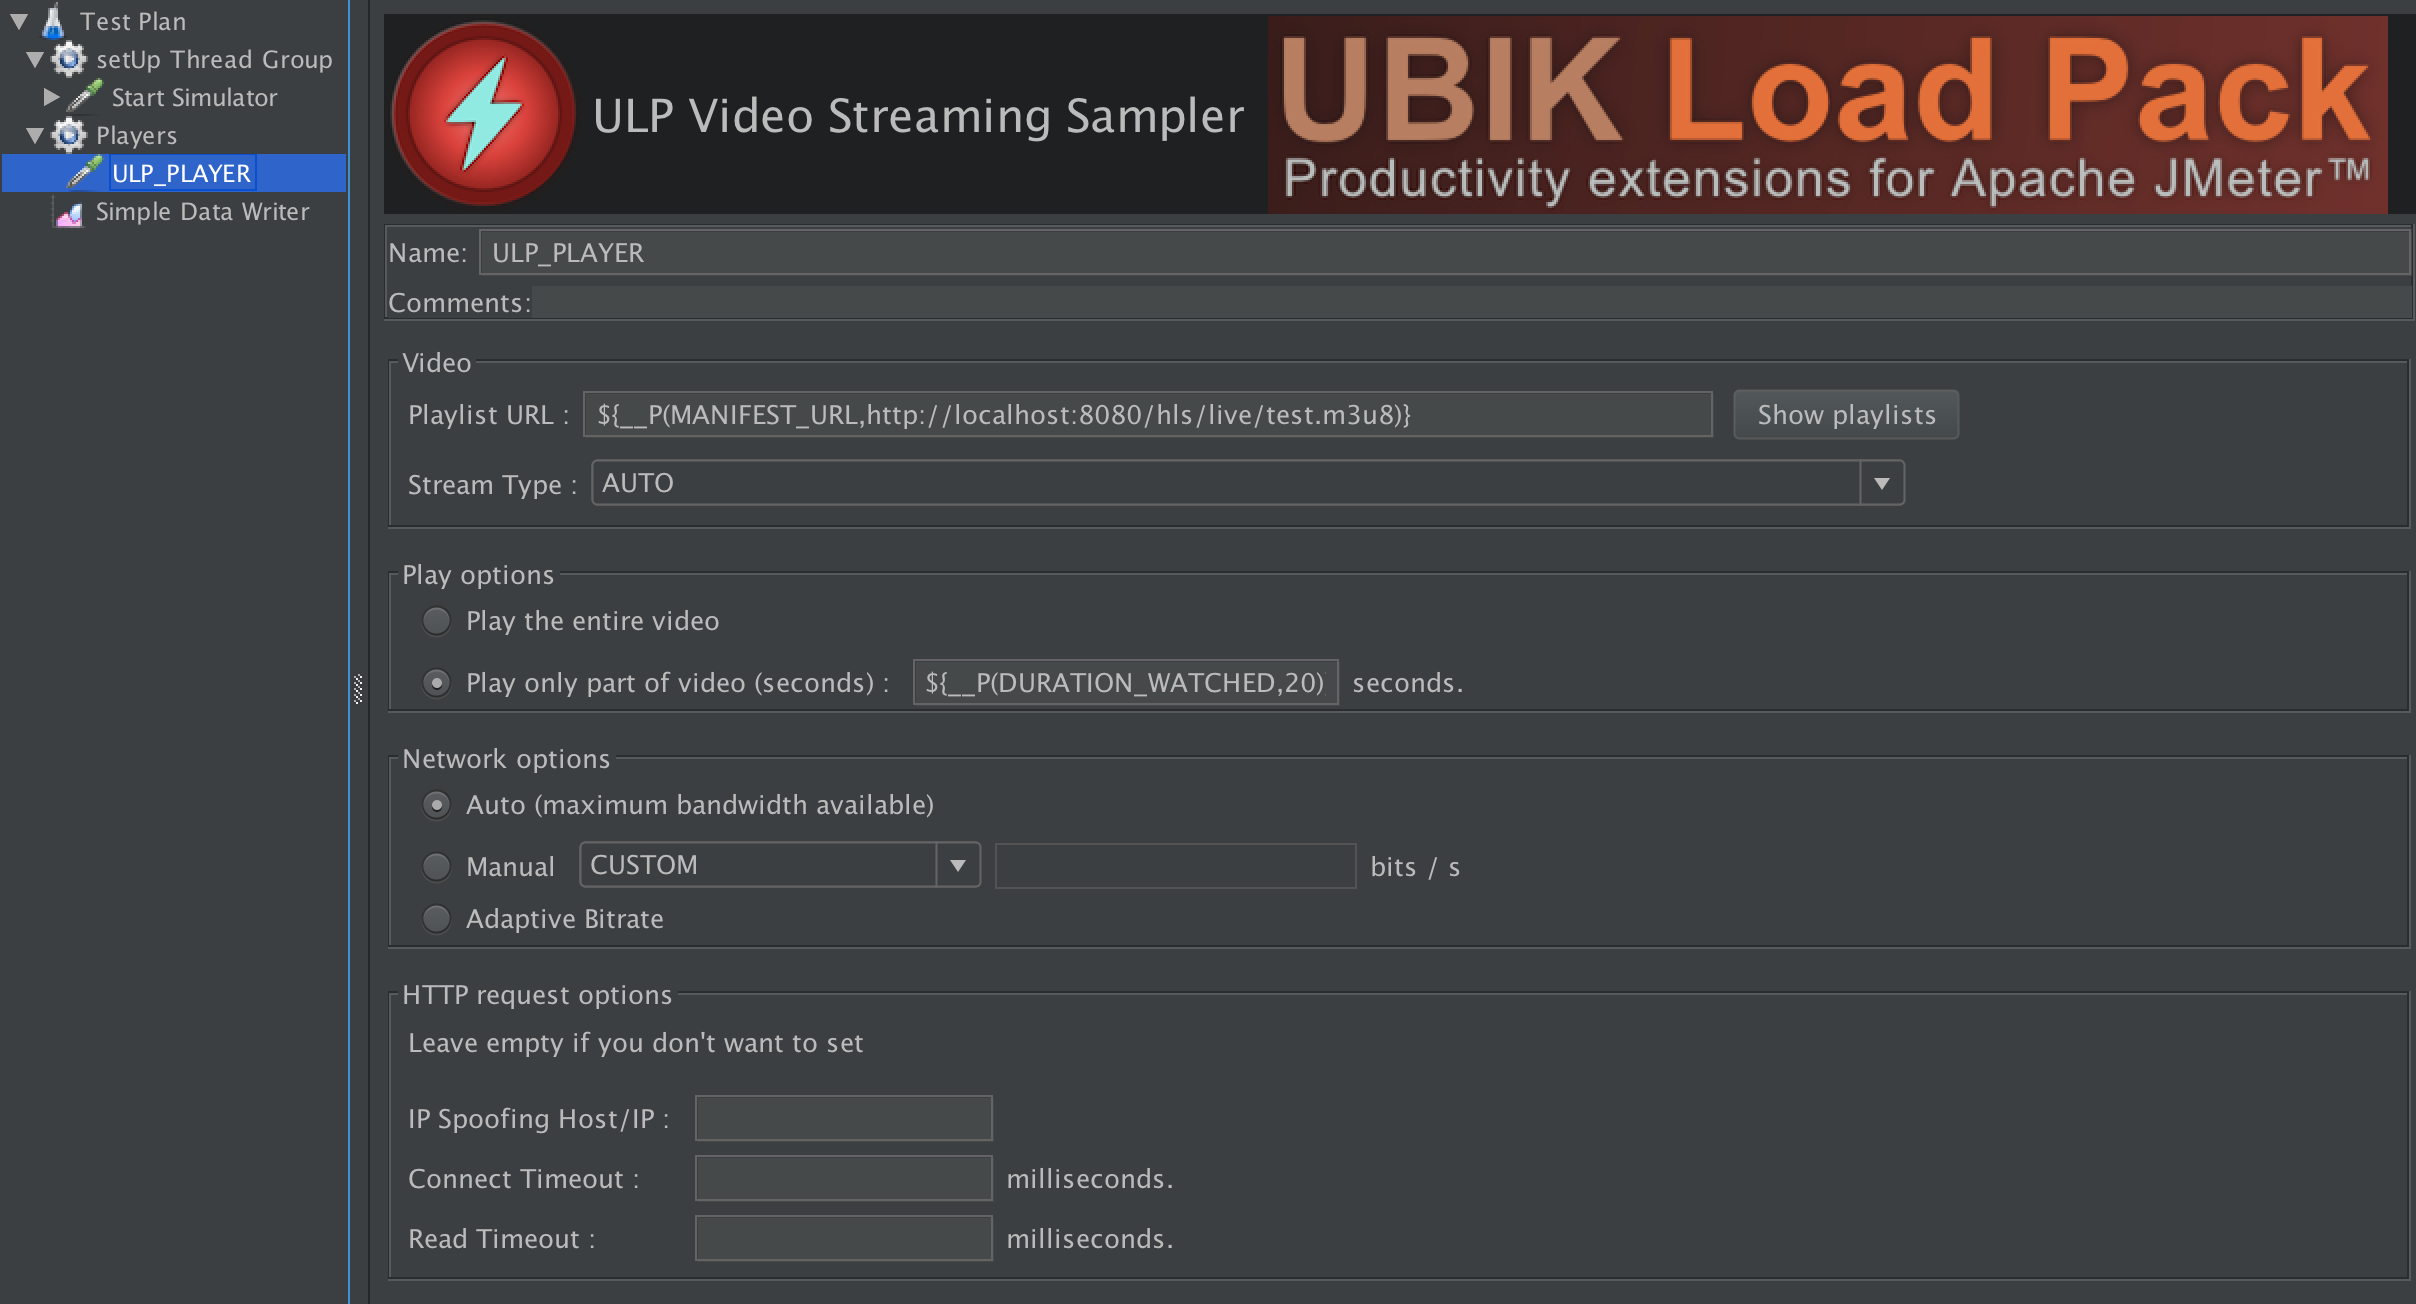
In UbikLoadPack streaming sampler we just set
- Playlist URL to the HLS manifest URL (we use a property MANIFEST_URL to be able to modify it from outside of JMeter, it defaults to our Mock server “http://localhost:8080/hls/live/test.m3u8“)
- the duration we want to read (we also use a property DURATION_WATCHED with default value of 20 seconds here)
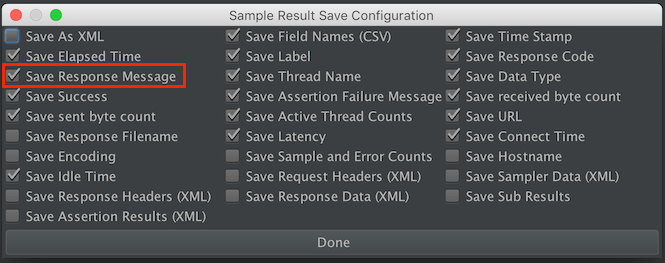
Finally note we setup a Simple Data Writer (right click on Test Plan > Add > Listener > Simple Data Writer) as default file generated by Blazemeter removes JMeter responseMessage which gives details on error, breaking the jmeter default report:
Taurus Setup
The setup is done in YAML syntax, we’ll call the file bzm-ubikloadpack-vs.yml
We first configure how test will be executed, here we’ll run:
- the existing JMX file called ulp_video_streaming_demo.jmx
- with 3 Virtual Users (as trial is limited to this number of threads) but you can run as many virtual users as your license allows it
- ramping up from 1 to 3 in 30 seconds
- holding the load for 5 minutes
- running from us-east-1
execution:
 scenario: UbikLoadPack-Demo
 concurrency: 3
 hold-for: 5m
 ramp-up: 30s
 locations:
 us-east-1: 1

scenarios:
   UbikLoadPack-Demo:
     script: ulp_video_streaming_demo.jmx
We then tell Taurus which JMeter version to use, note we’ll use JMeter 5.2.1 as we want to use new sexy features mainly the ability to graph over time additional metric, we need this feature to graph UbikLoadPack custom video metrics
We configure it this way:
settings:
   env:
      # A Version higher or equal to 5.2.1 is required
      JMETER_VERSION: "5.2.1"
Finally we set some properties specific to our test:
modules:
   jmeter:
     force-ctg: false
     detect-plugins: true
     properties:
       # Uncomment this and change this for the URL of your manifest
       #MANIFEST_URL:
       # Duration of video watched in seconds
       DURATION_WATCHED: 10
       jmeter.reportgenerator.report_title: UbikLoadPack Video Streaming Demo
       jmeter.reportgenerator.exporter.html.series_filter: ^(ULP_PLAYER)(-success|-failure)?$
       jmeter.reportgenerator.overall_granularity: 1000
       ULP.videostreaming.licensepath: ubik-streaming-plugin.license
       sample_variables: ulp_buffer_fill,ulp_lag_time,ulp_play_time,ulp_lag_ratio,ulp_lag_ratio_wo_bf,ulp_dwn_time
       output: ${TAURUS_ARTIFACTS_DIR}/
The whole YAML file can be downloaded from github project.
Note that in folder blazemeter, we have:
- ulp_video_streaming_demo.jmx : The JMeter Test plan
- bzm-ubikloadpack-vs.yml : The Taurus YAML file
Testing your own Video Streaming servers
If you want to test your own servers, just replace in YAML file the MANIFEST_URL property by your manifest URL, for example:
MANIFEST_URL: https://bitmovin-a.akamaihd.net/content/sintel/sintel.mpd
Creation Steps on Blazemeter
Login to Blazemeter and click on Create Test:

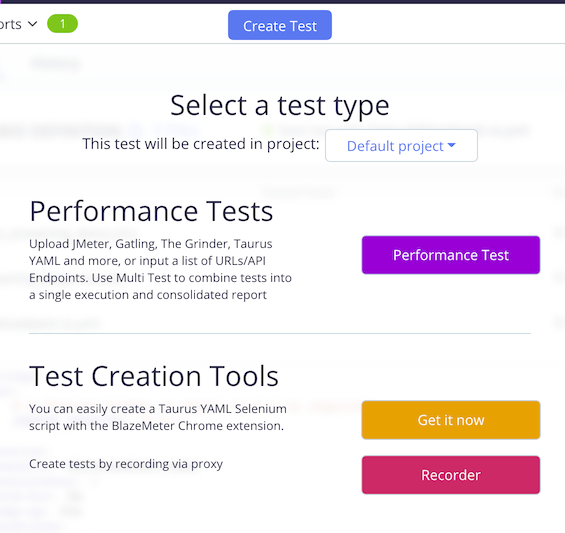
Select Performance Test:
Click on Upload Script:

Upload the files in blazemeter folder that we showed previously and add the below file that is available when you request a trial:
- ubik-streaming-plugin.license (attached to the trial mail)
You end up with this:

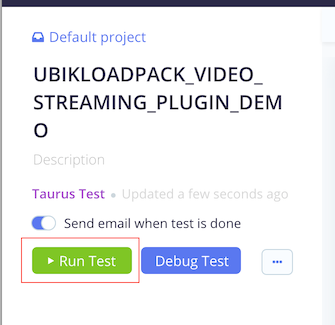
Then click on Run Test:
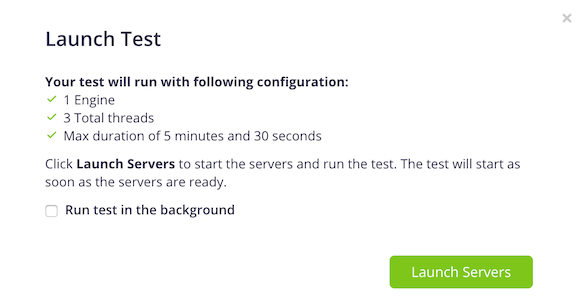
A popup opens, click on Launch Servers:
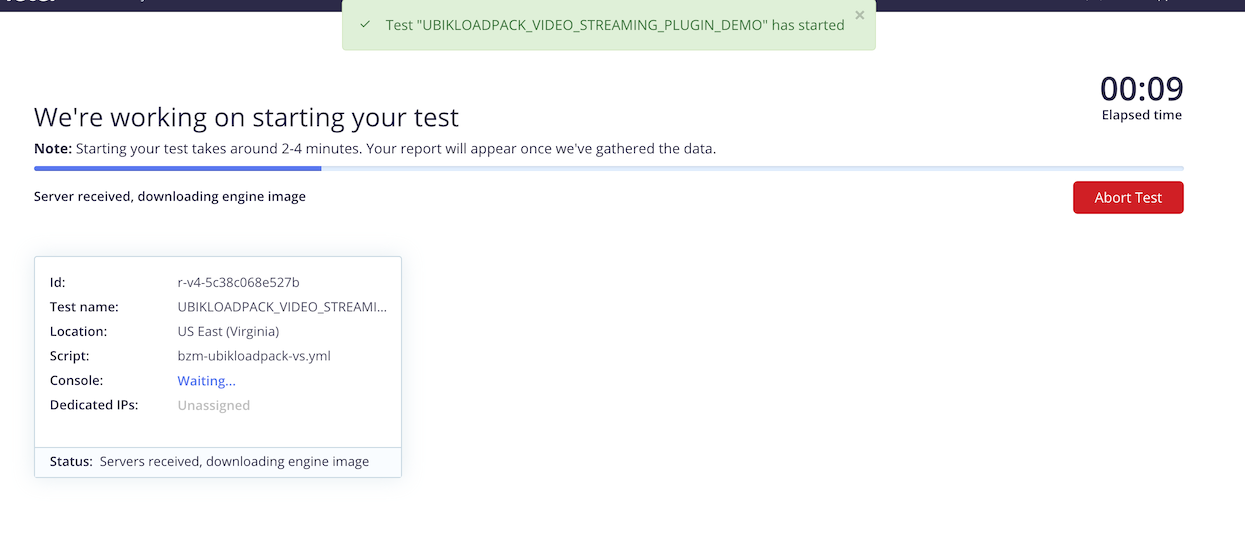
You’ll then have to wait for test to start (4 minutes as average in our tests):
The test then starts and you can see graphs appear to monitor your test:
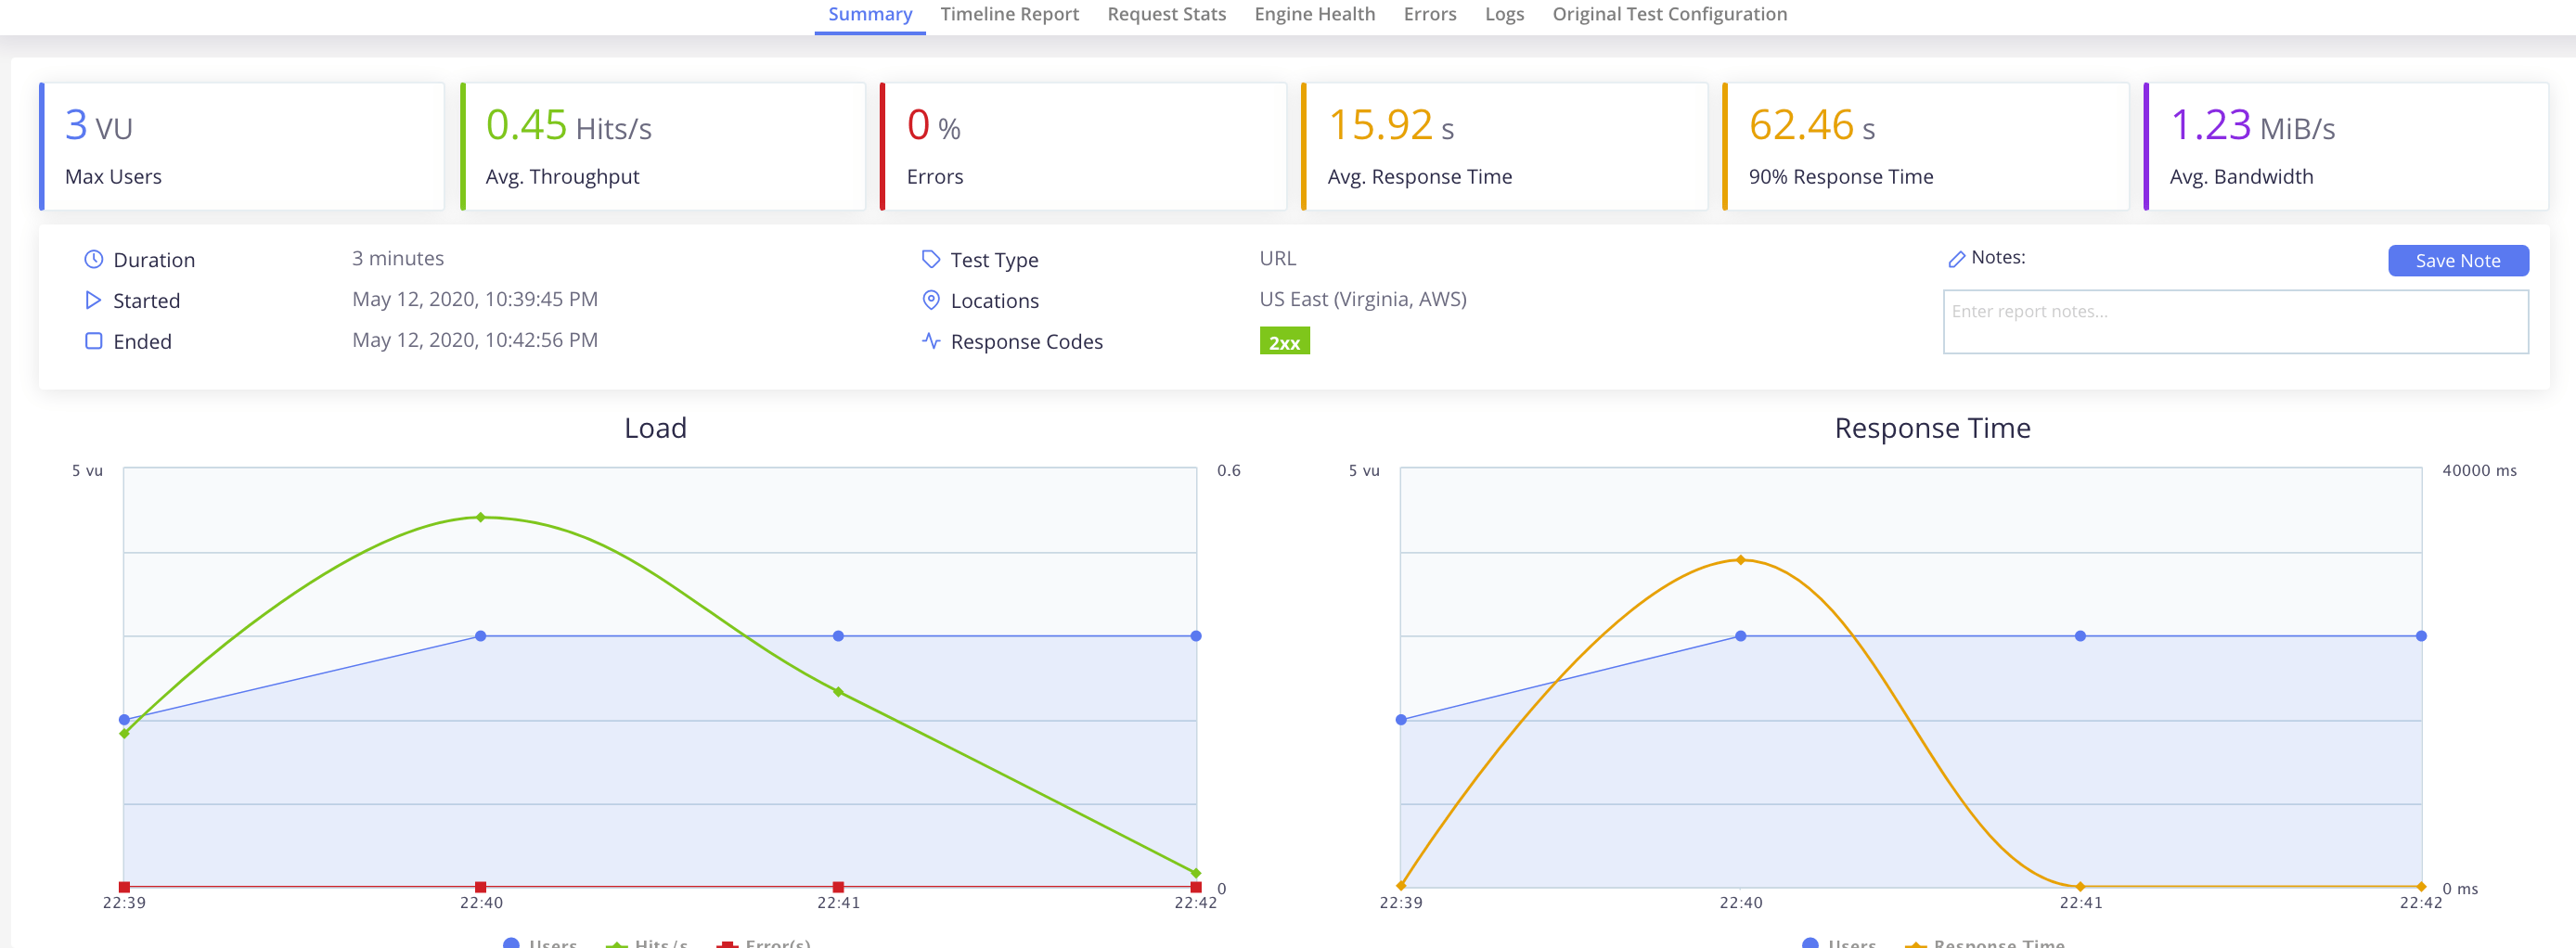
You can select the KPI you want to watch:
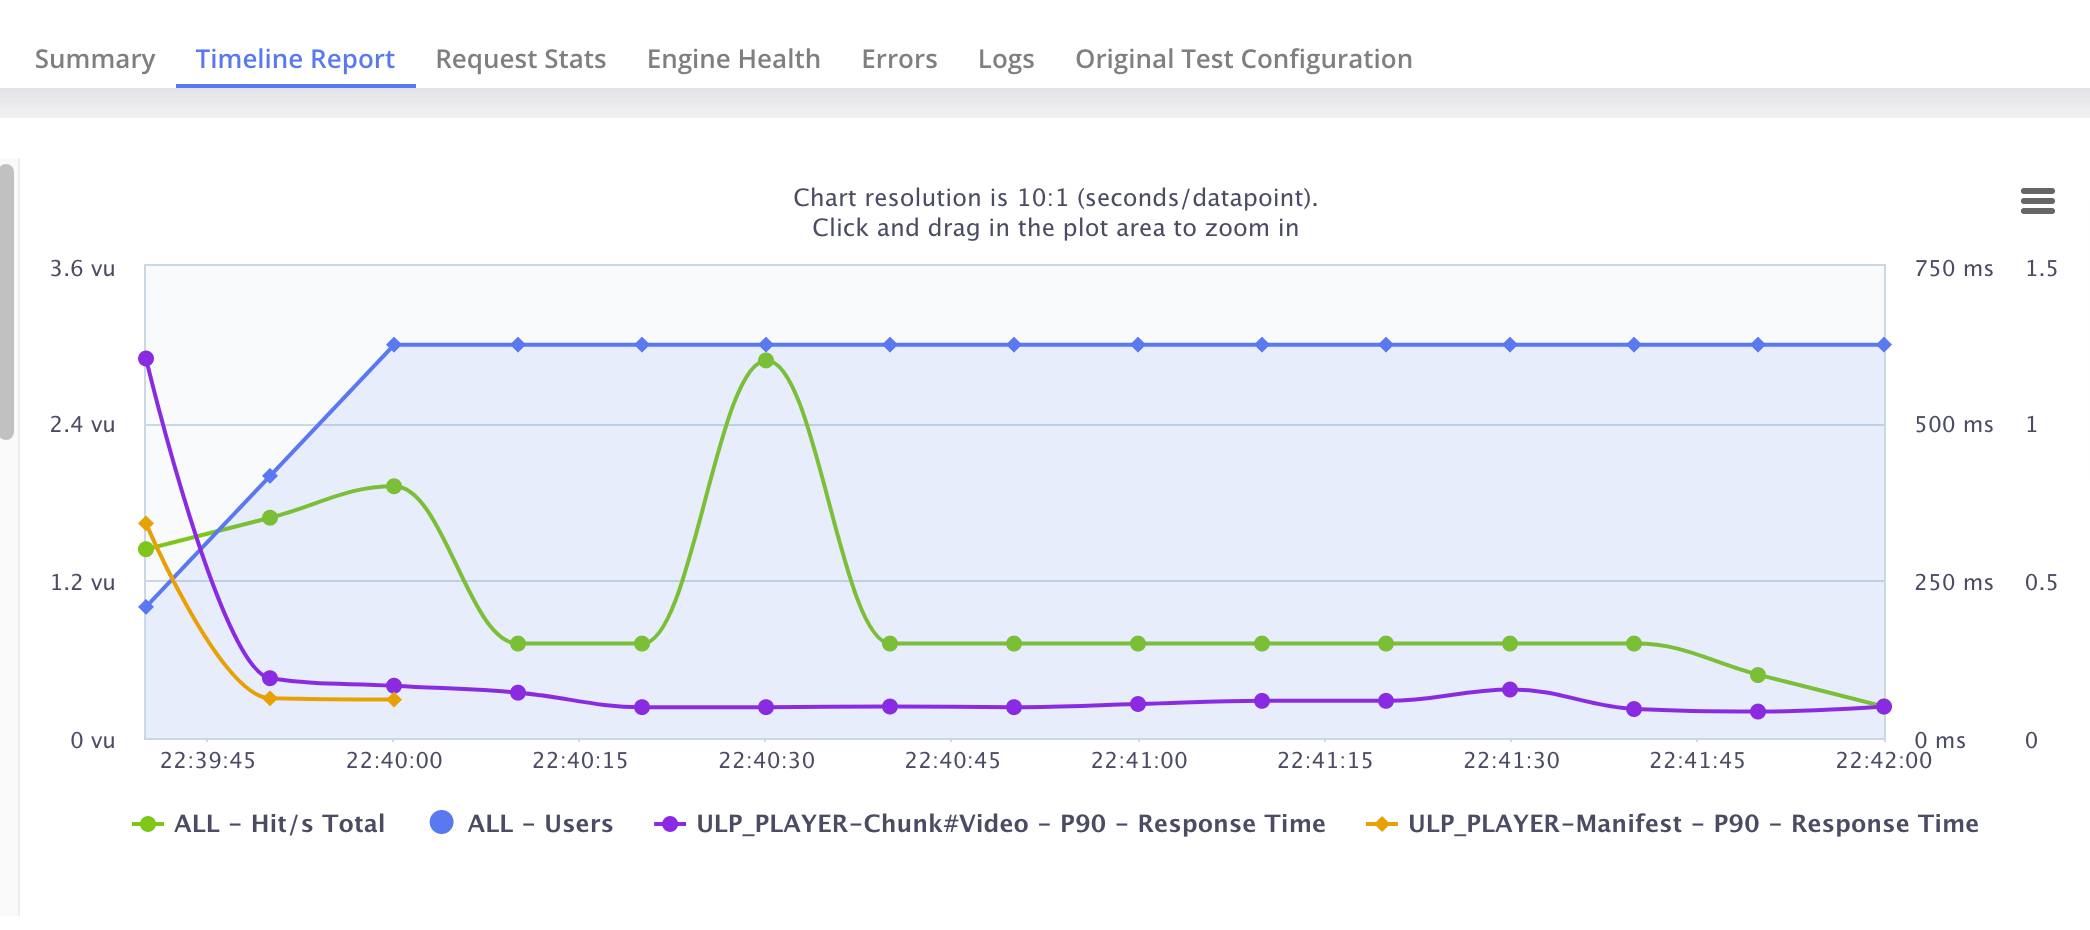
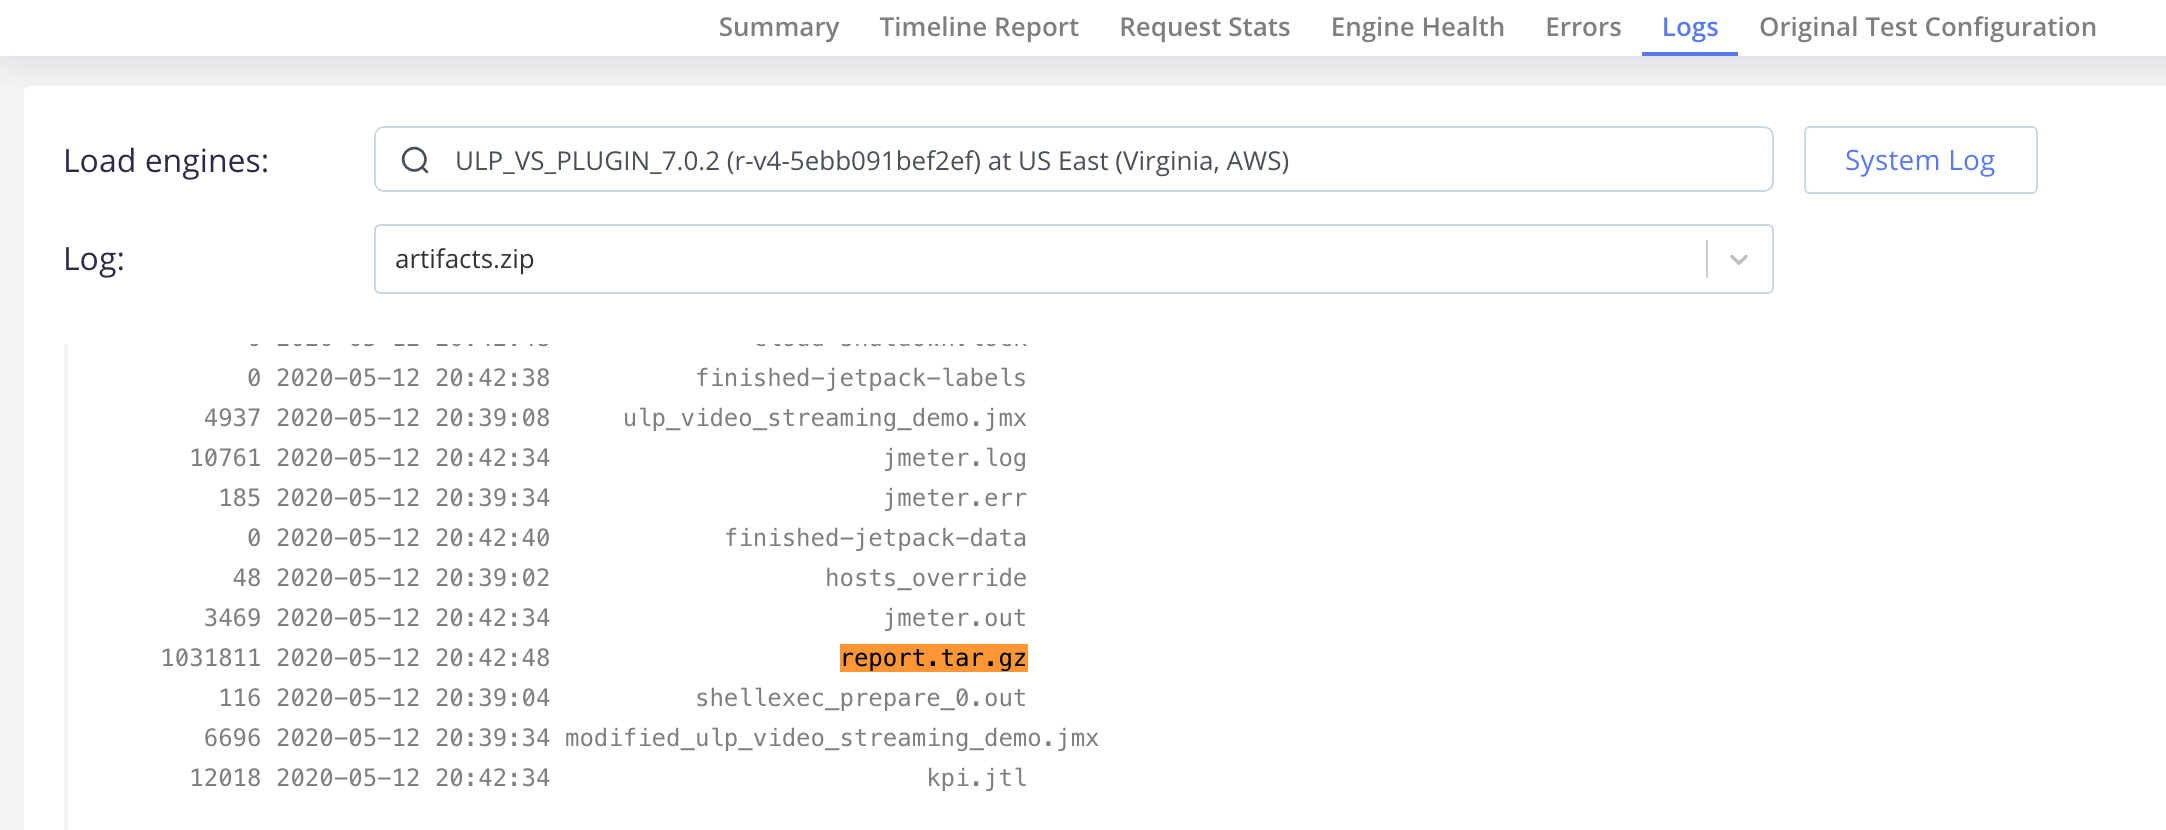
Once test is finished, go to Logs tab where you can download artifacts by clicking on artifacts.zip:

Note that the HTML report of JMeter has also been generated as part of those artifacts, and contains the UbikLoadPack custom metrics graphed over time:
Report:
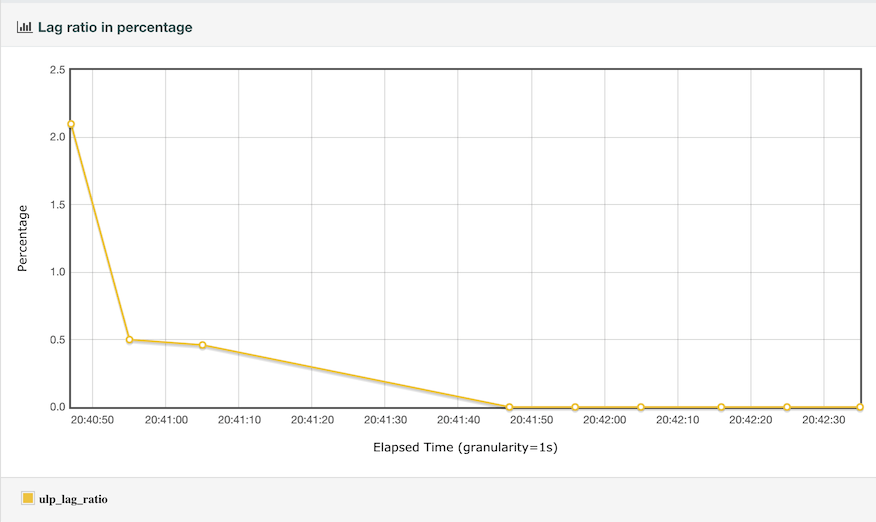
At the end, we have a JMeter HTML report generated with custom UbikLoadPack report in the report folder.
Statistics

Lag Ratio over time:
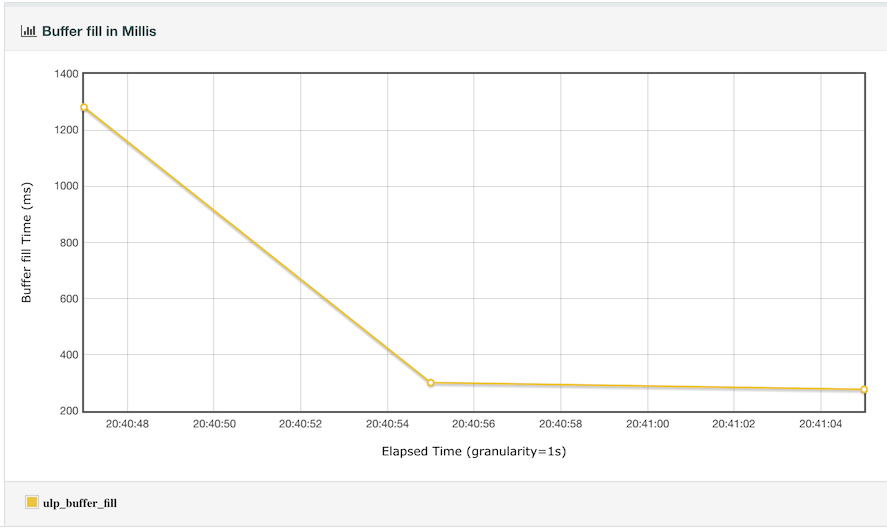
Buffer Fill over time
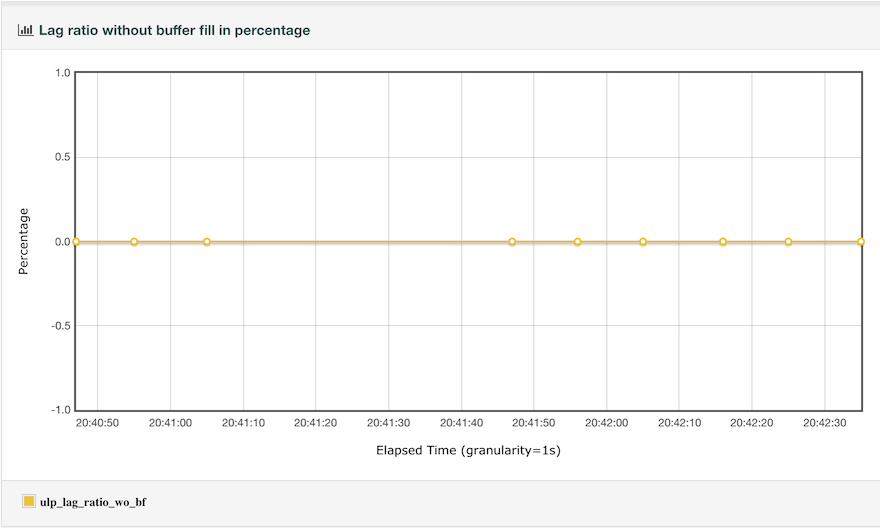
Lag Ratio without Buffer fille over time:
Try it:
Request a trial version HERE.
Ask for a turnkey or consulting service at ubik-load-pack-sales@ubik-ingenierie.com.
About UbikLoadPack :
- Ubik Load Pack is used by Big players in the Video streaming field
- We provide professional services for Load Testing
- Learn more about our streaming plugin
- Detailed features of UbikLoadPack Streaming Solution
- Get a Free trial
- Manage your UBIK Load Pack plugins with JMeter-plugins Manager


